Getting Started
E4jConnect allows you to integrate WhatsApp through the WhatsApp Business Cloud APIs.
The connection is established using your own WhatsApp Business account (WABA). Regular WhatsApp accounts are not supported, only Business ones. Once activated, you will be able to communicate with your guests directly from your website via WhatsApp, without the need to switch between different applications.
WhatsApp uses a template-based system for the first contact with customers. This means that the first message sent from the property to the guest can only be sent using a pre-approved template. Once the guest replies to the initial message, WhatsApp opens a 24-hour customer service window (CSW), during which you can freely exchange messages of any kind with the guest (Text, Attachments etc.). Additionally, every new message sent by the guest resets this 24-hour window.
On the other hand, WhatsApp always applies fees when sending template messages, regardless of the 24-hour customer service window. Pricing is determined by WhatsApp and may vary depending on factors such as the guest’s location and the category of the template message. For more detailed information about pricing, we recommend referring to the official WhatsApp documentation or contacting WhatsApp support.
Additionally, the core features of the WhatsApp integration are designed to work hand in hand with the AI Channel, enabling a high level of automation.
Note: WhatsApp does not share messages sent or received before the connection is established. Therefore, any messages prior to the connection will not be imported into Vik Booking.
First Connection
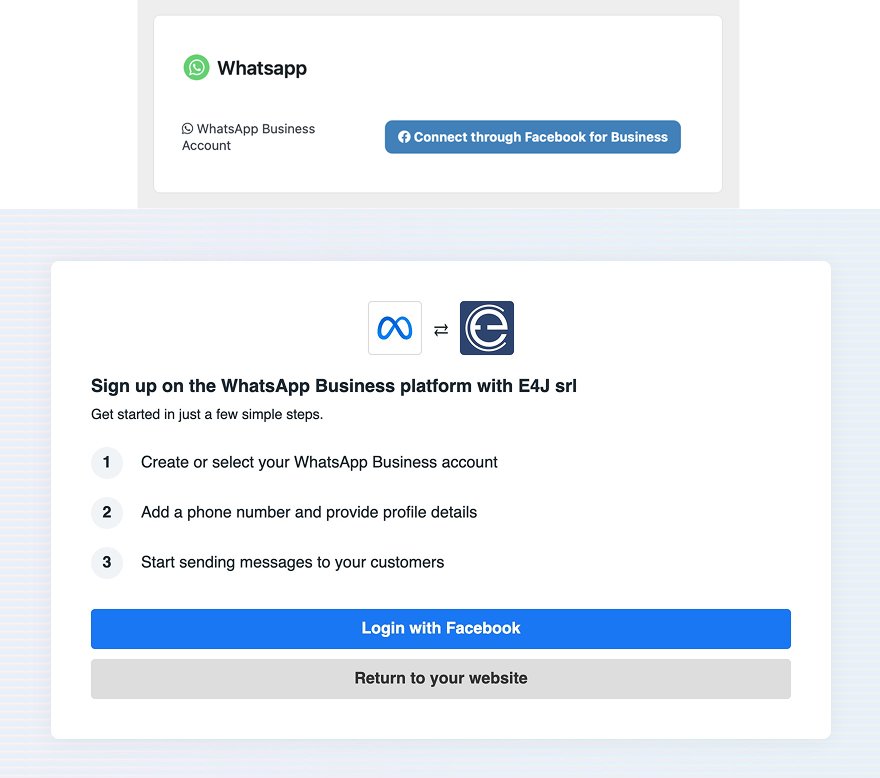
To establish the connection with Whatsapp, open Vik Channel Manager, select “Whatsapp Massaging” as your active channel and proceed to the “Settings” page.

Here, you are going to find a button that allows you to connect your WABA to our platform. Click this button to start the authentication process via Facebook.
During the login process, you will be asked to choose which WhatsApp Business Account (WABA) to use.
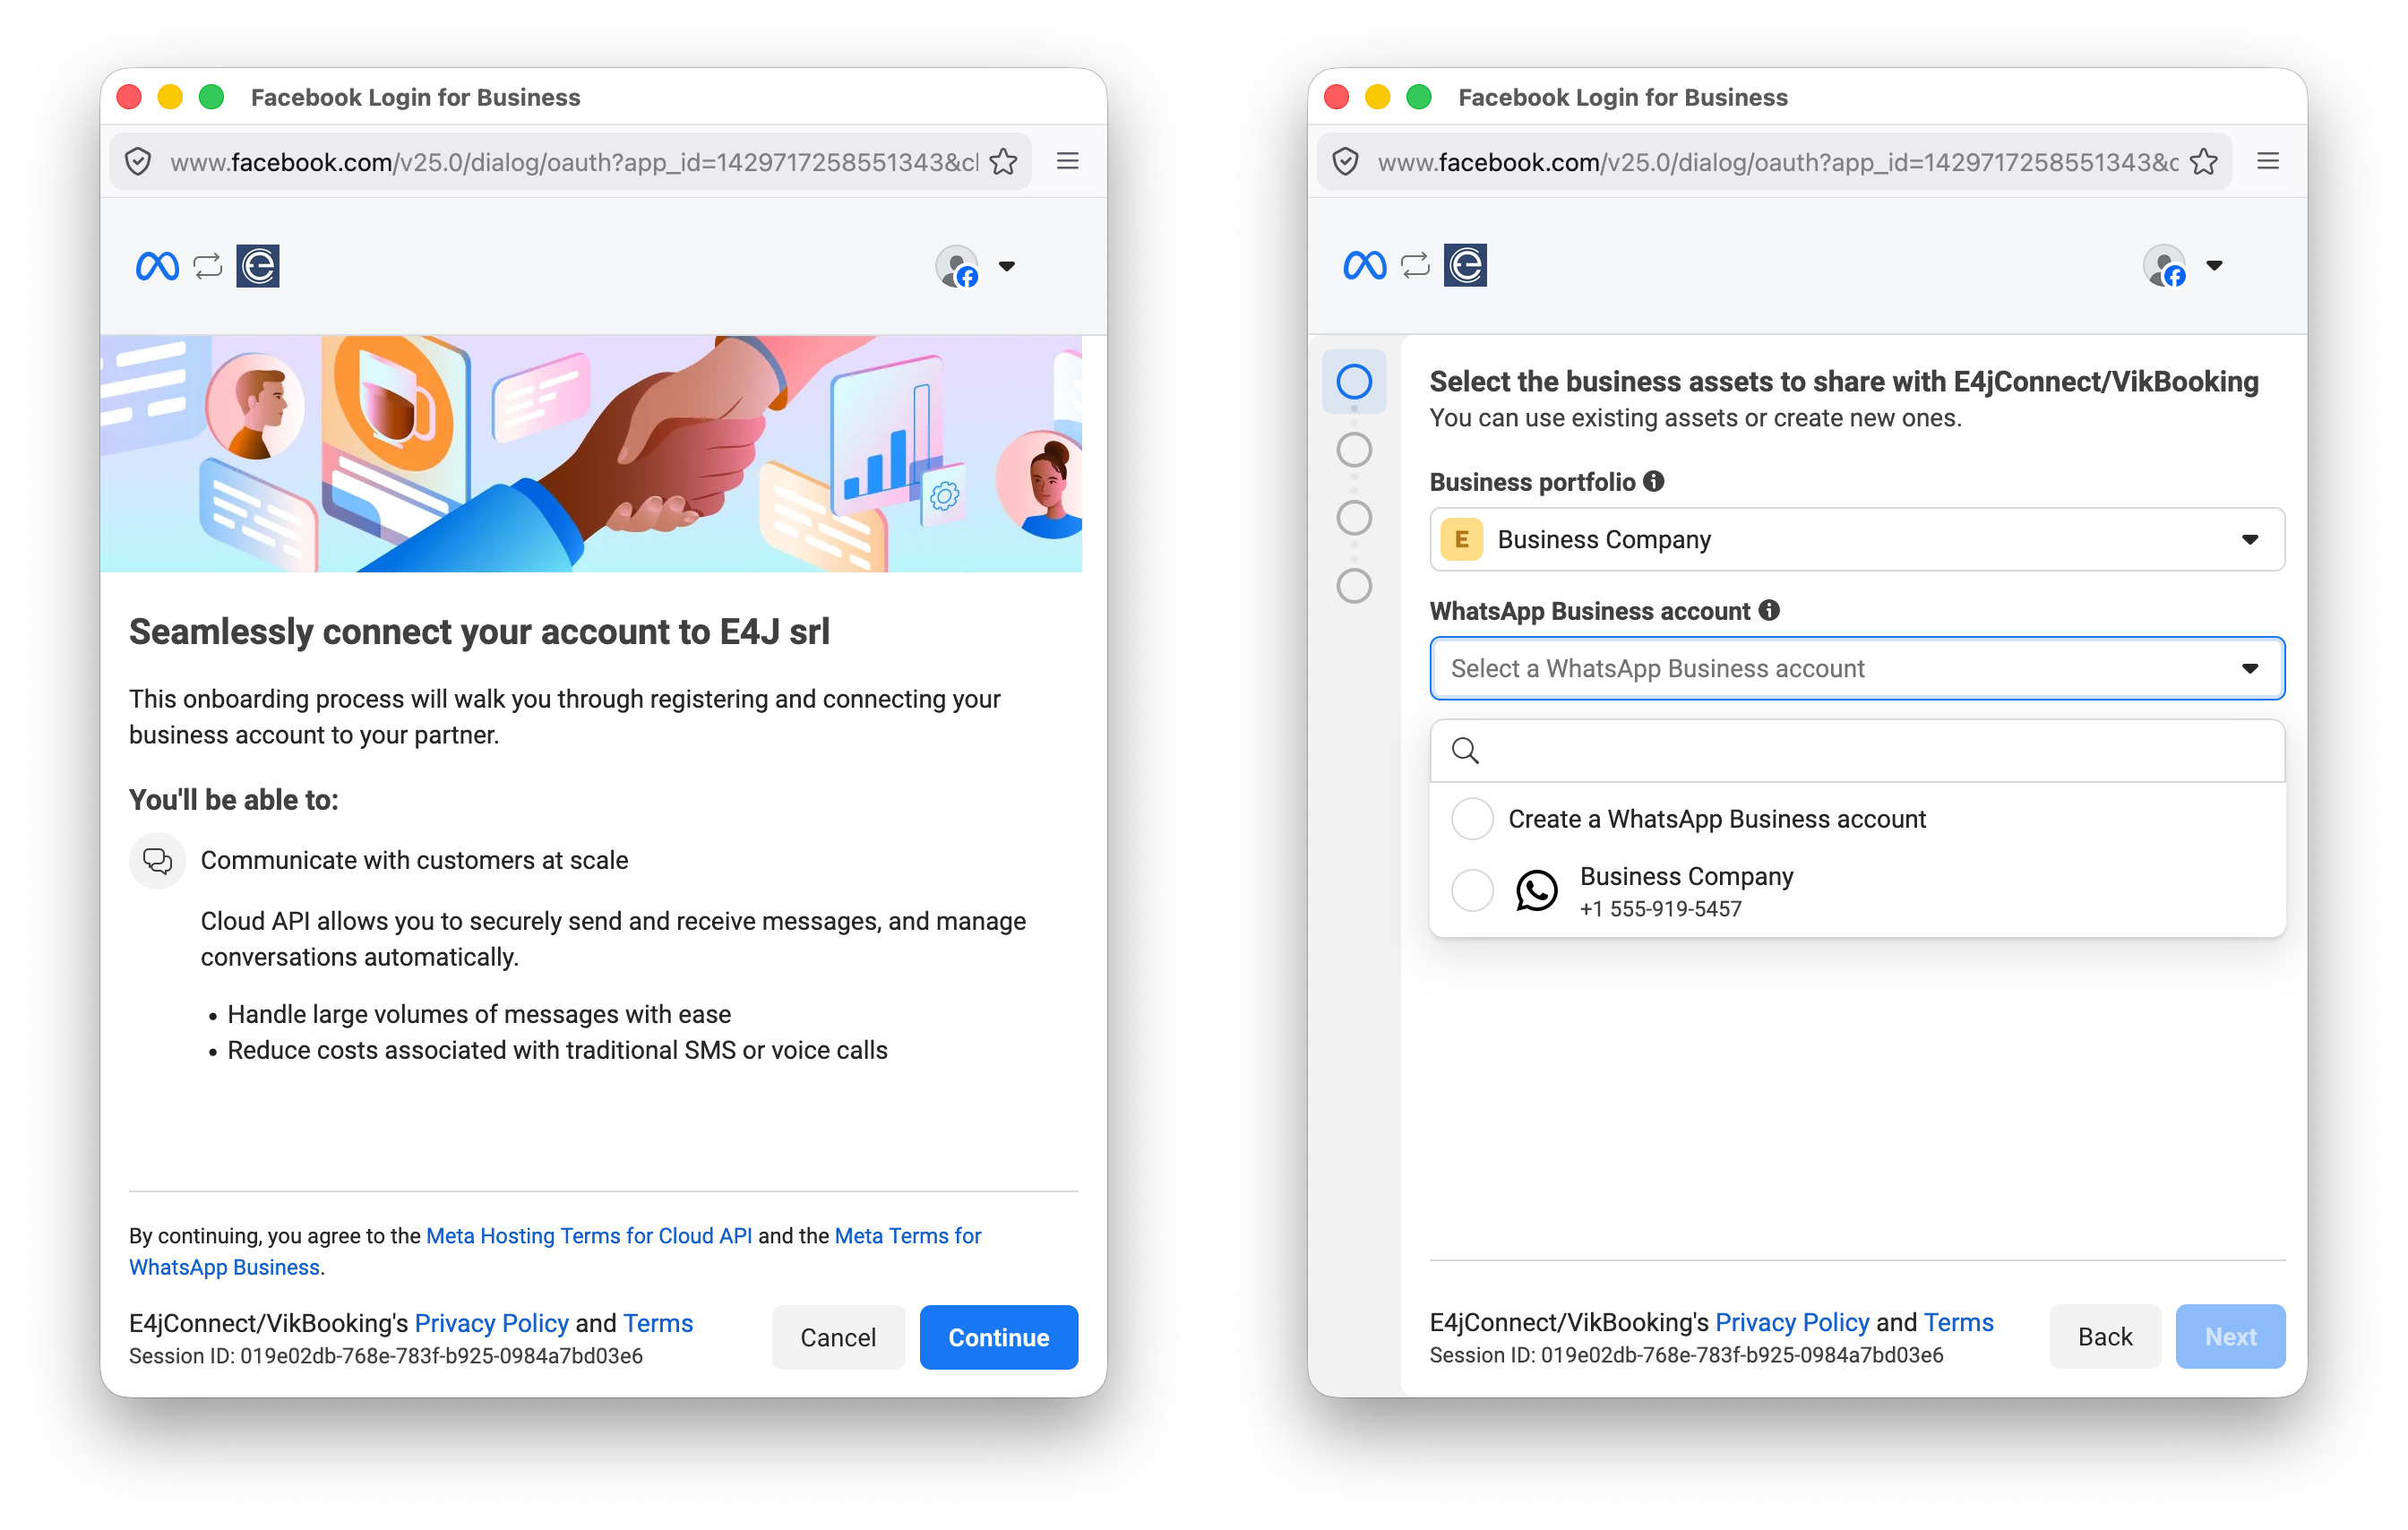
After selecting the WABA you will be asked the phone number associated with it to use.
Please note that a phone number already in use on another WhatsApp device or application cannot be connected. Users who do not wish to sacrifice their existing WhatsApp number from another device or app can instead choose to obtain a WhatsApp Provided Phone Number (virtual phone number).
Obtaining a WhatsApp Provided Phone Number and Connecting a New or Existing One.
Note: Users who already have an available phone number (not currently in use on any device or application) can skip the Steps 1-3 below and proceed directly to Step 4.
-
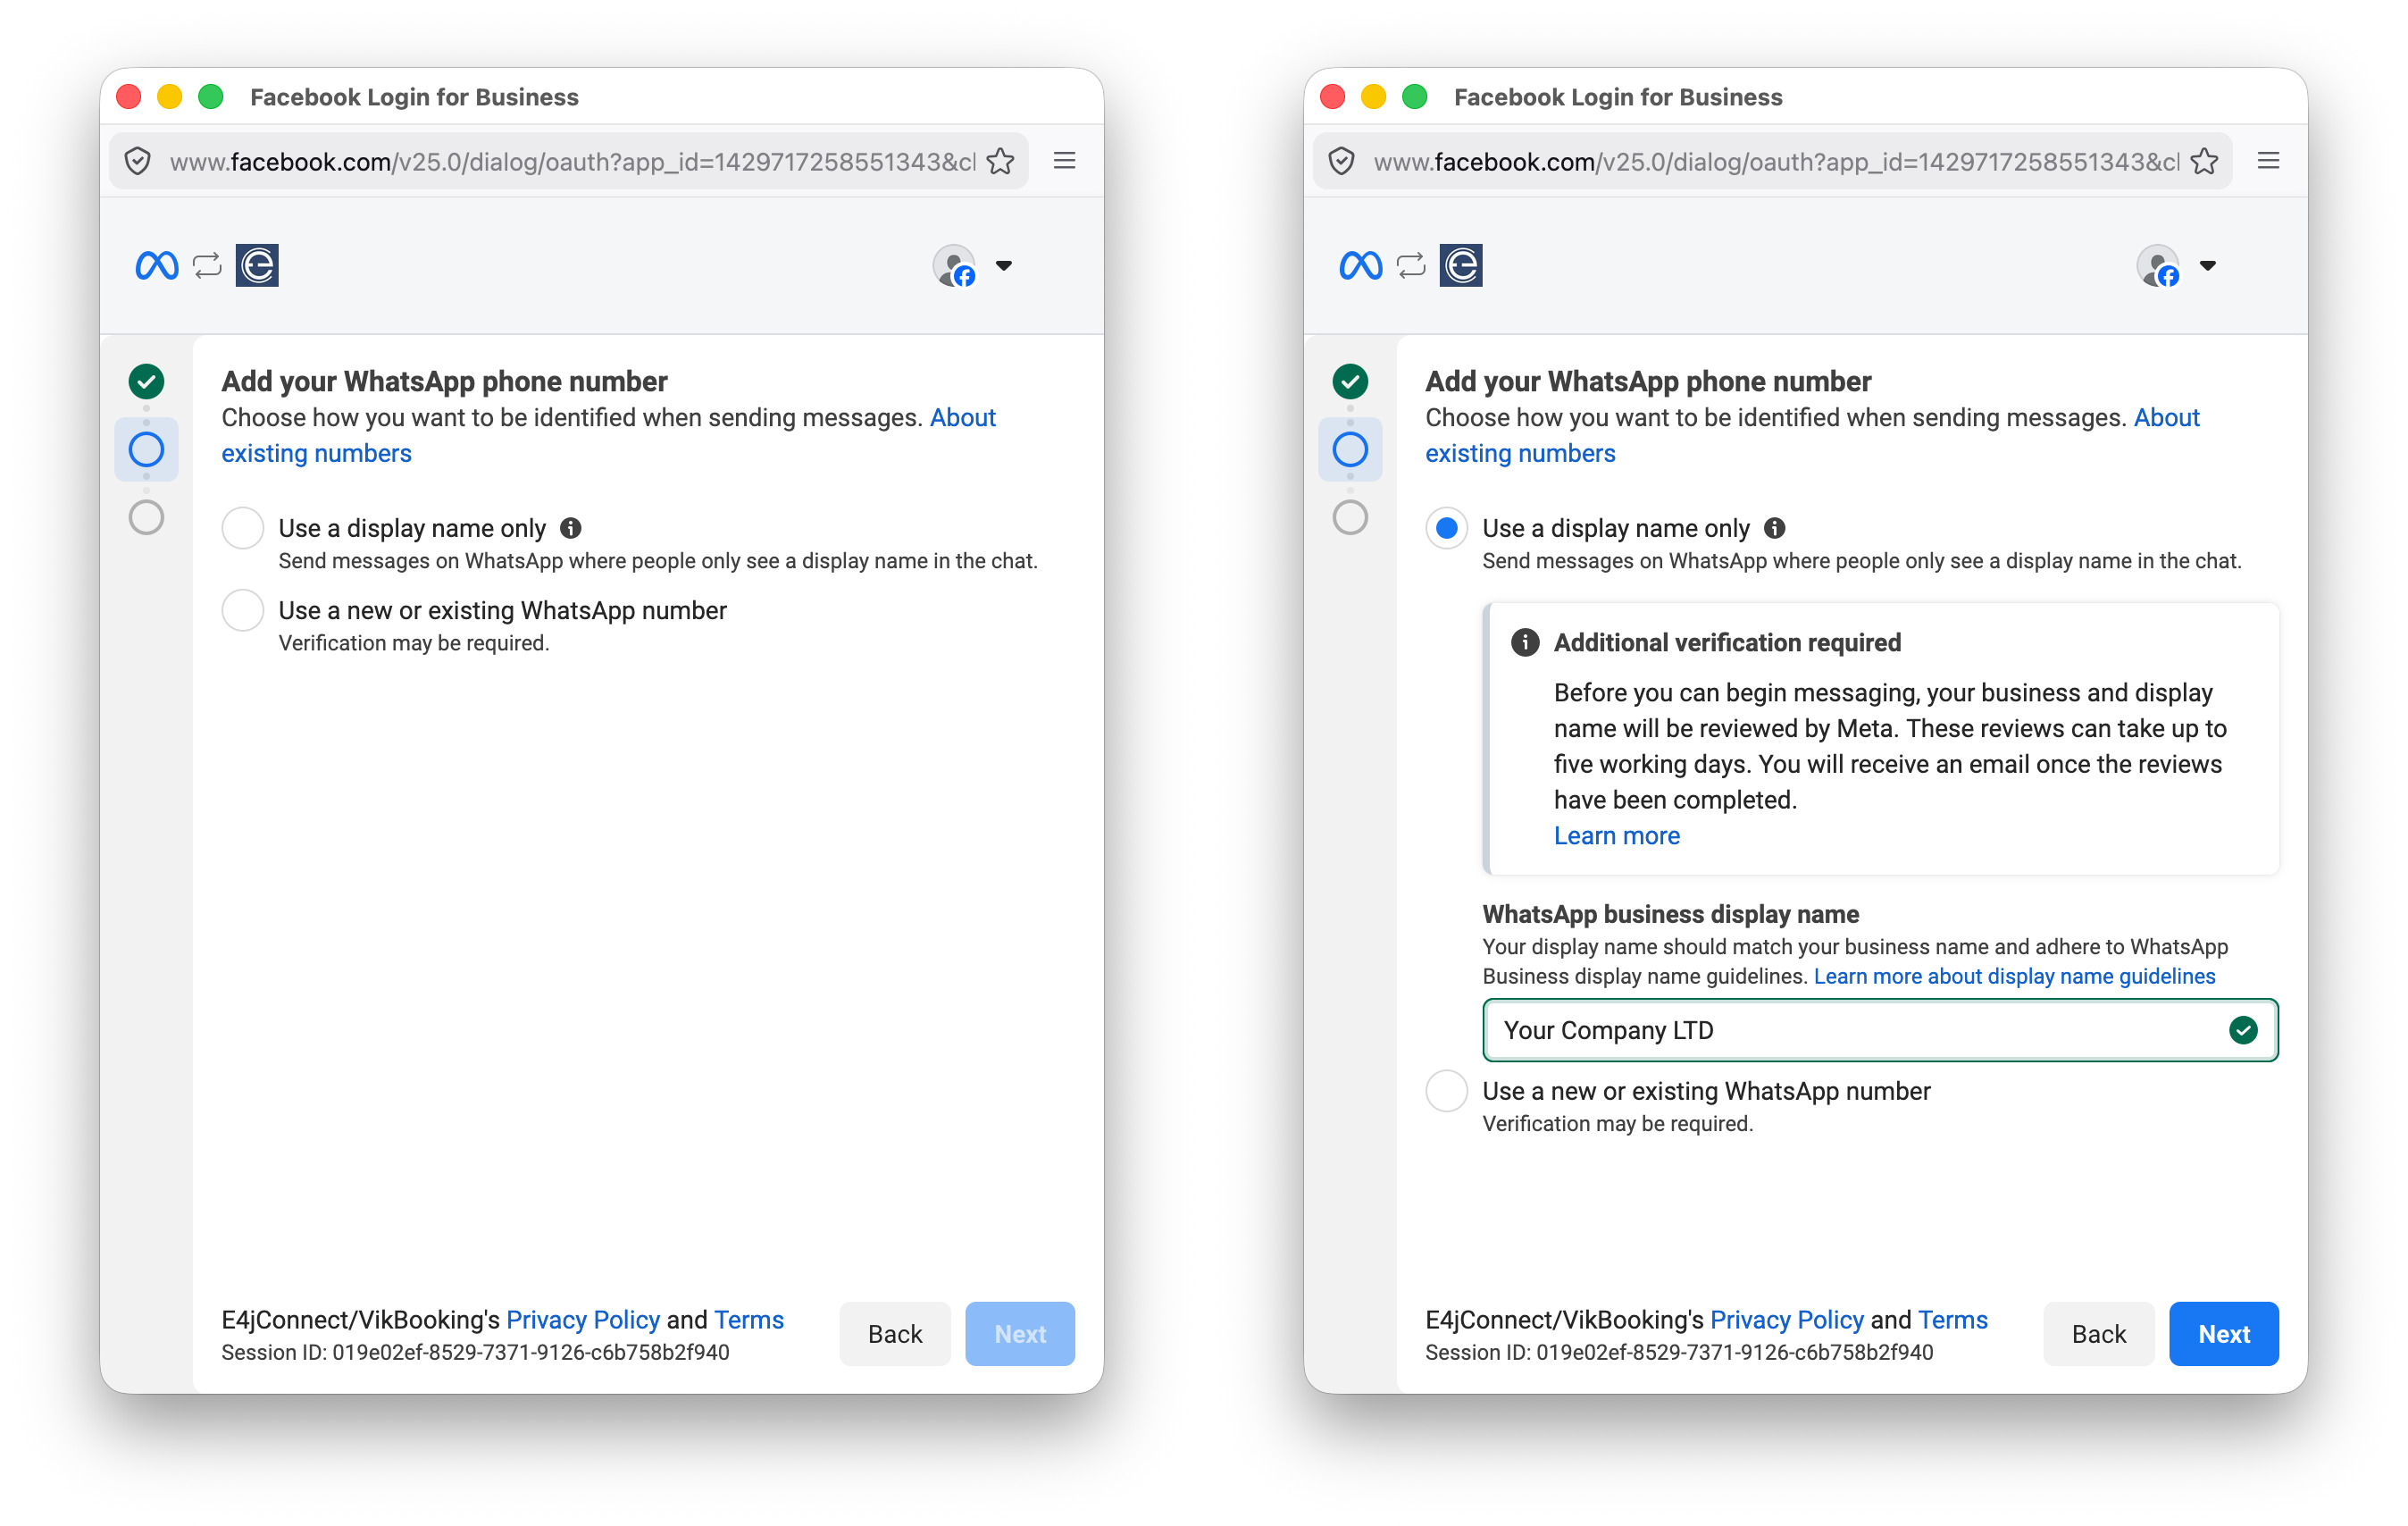
To obtain a WhatsApp Provided Phone Number, you must go through the connection process and choose to connect a Display Name (“Use a display name only”) instead of an existing phone number. Then provide a “WhatsApp Business Display Name” and click the “Next” button.
- You will be asked to review the data shared with e4jConnect/VikBooking. Please verify that everything is correct, then click the “Confirm” button first and the “Finish” button afterward.
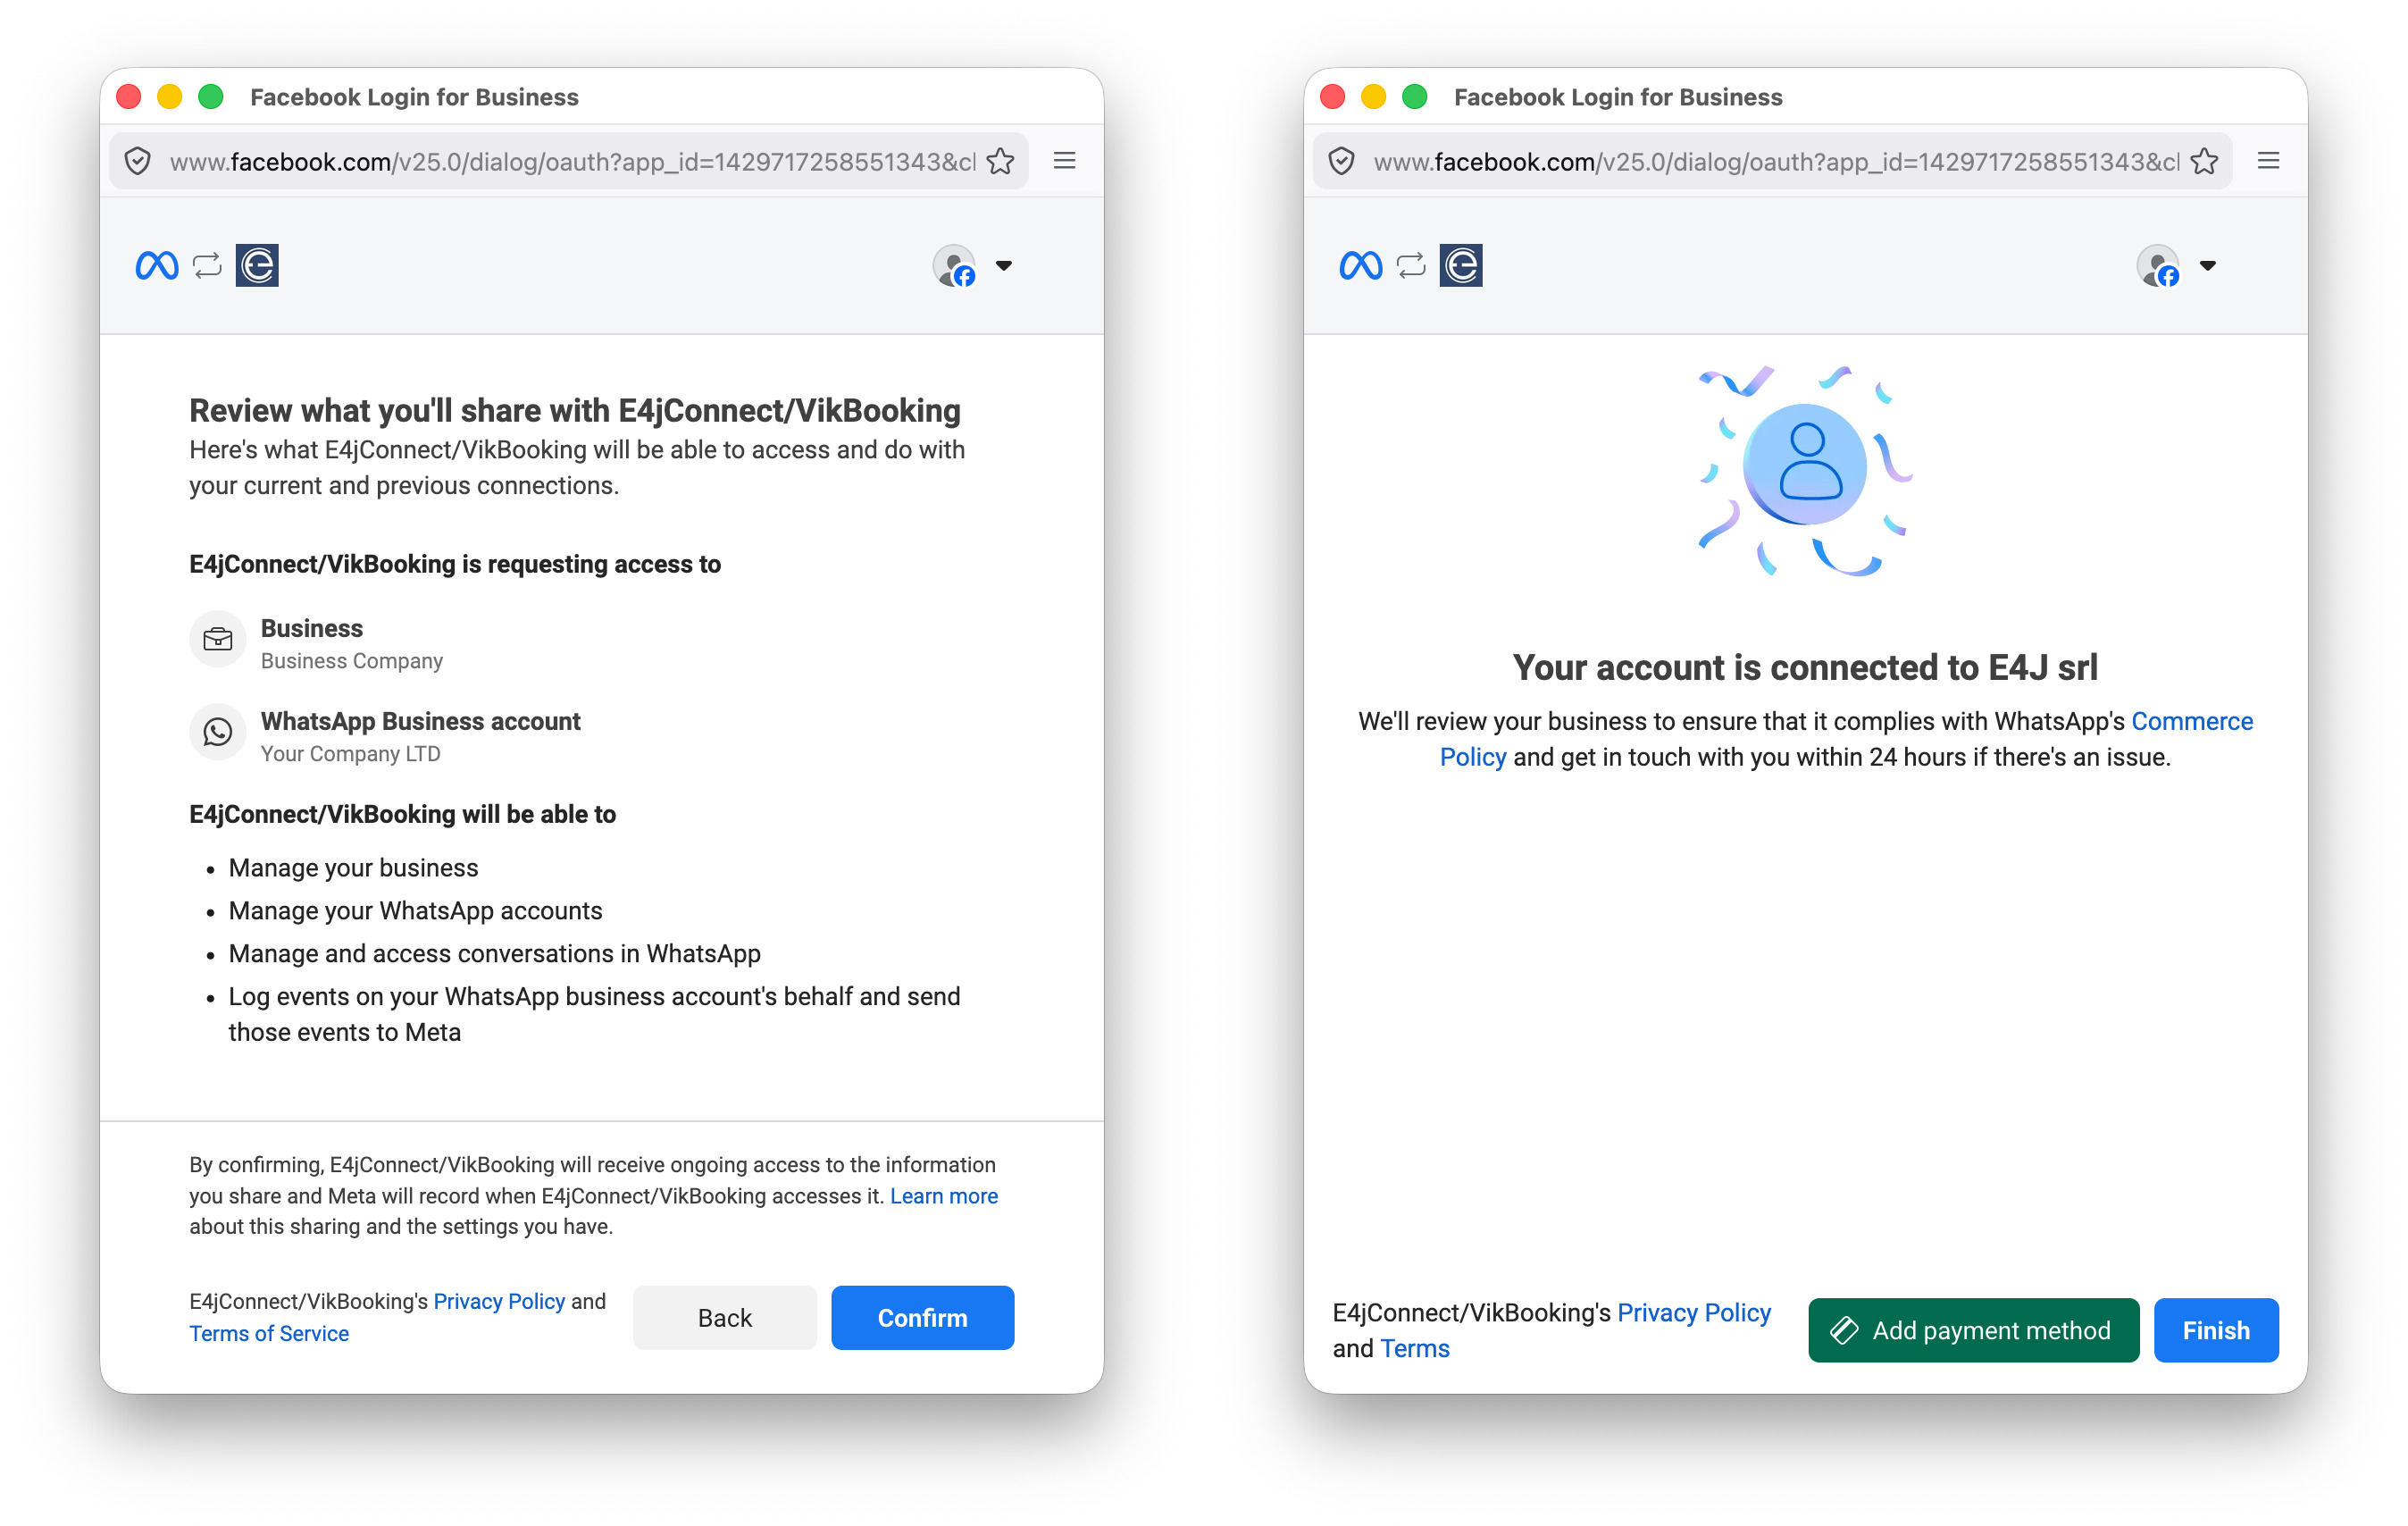
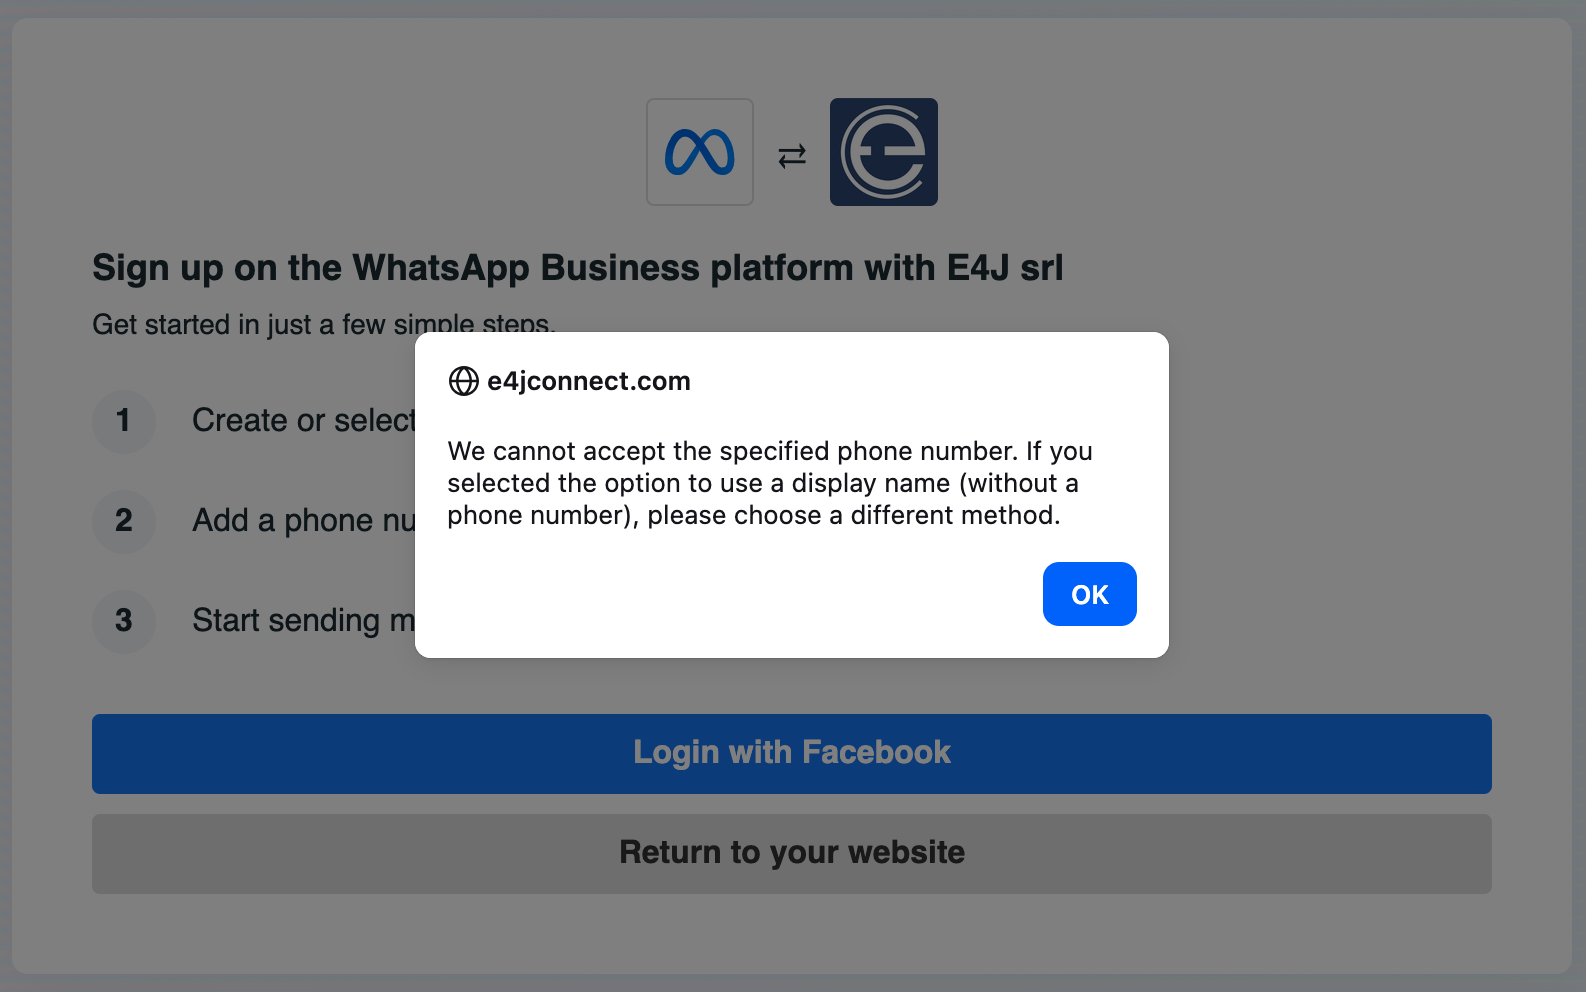
- At this point, you will be presented with an error message. This is completely normal, as during the creation of a WhatsApp Provided Phone Number, only partial data is shared by Meta, which is insufficient to complete the connection with the e4jConnect/VikBooking app. Simply click “OK” and start the connection process again using the “Login with Facebook” button.
- Select the second option: “Use a new or existing WhatsApp number” and choose the phone number to connect. Then complete the procedure by clicking the “Next” button.
Note: If you have previously created a new virtual phone number provided by WhatsApp it will now appear under your account and can be selected as the phone number to connect.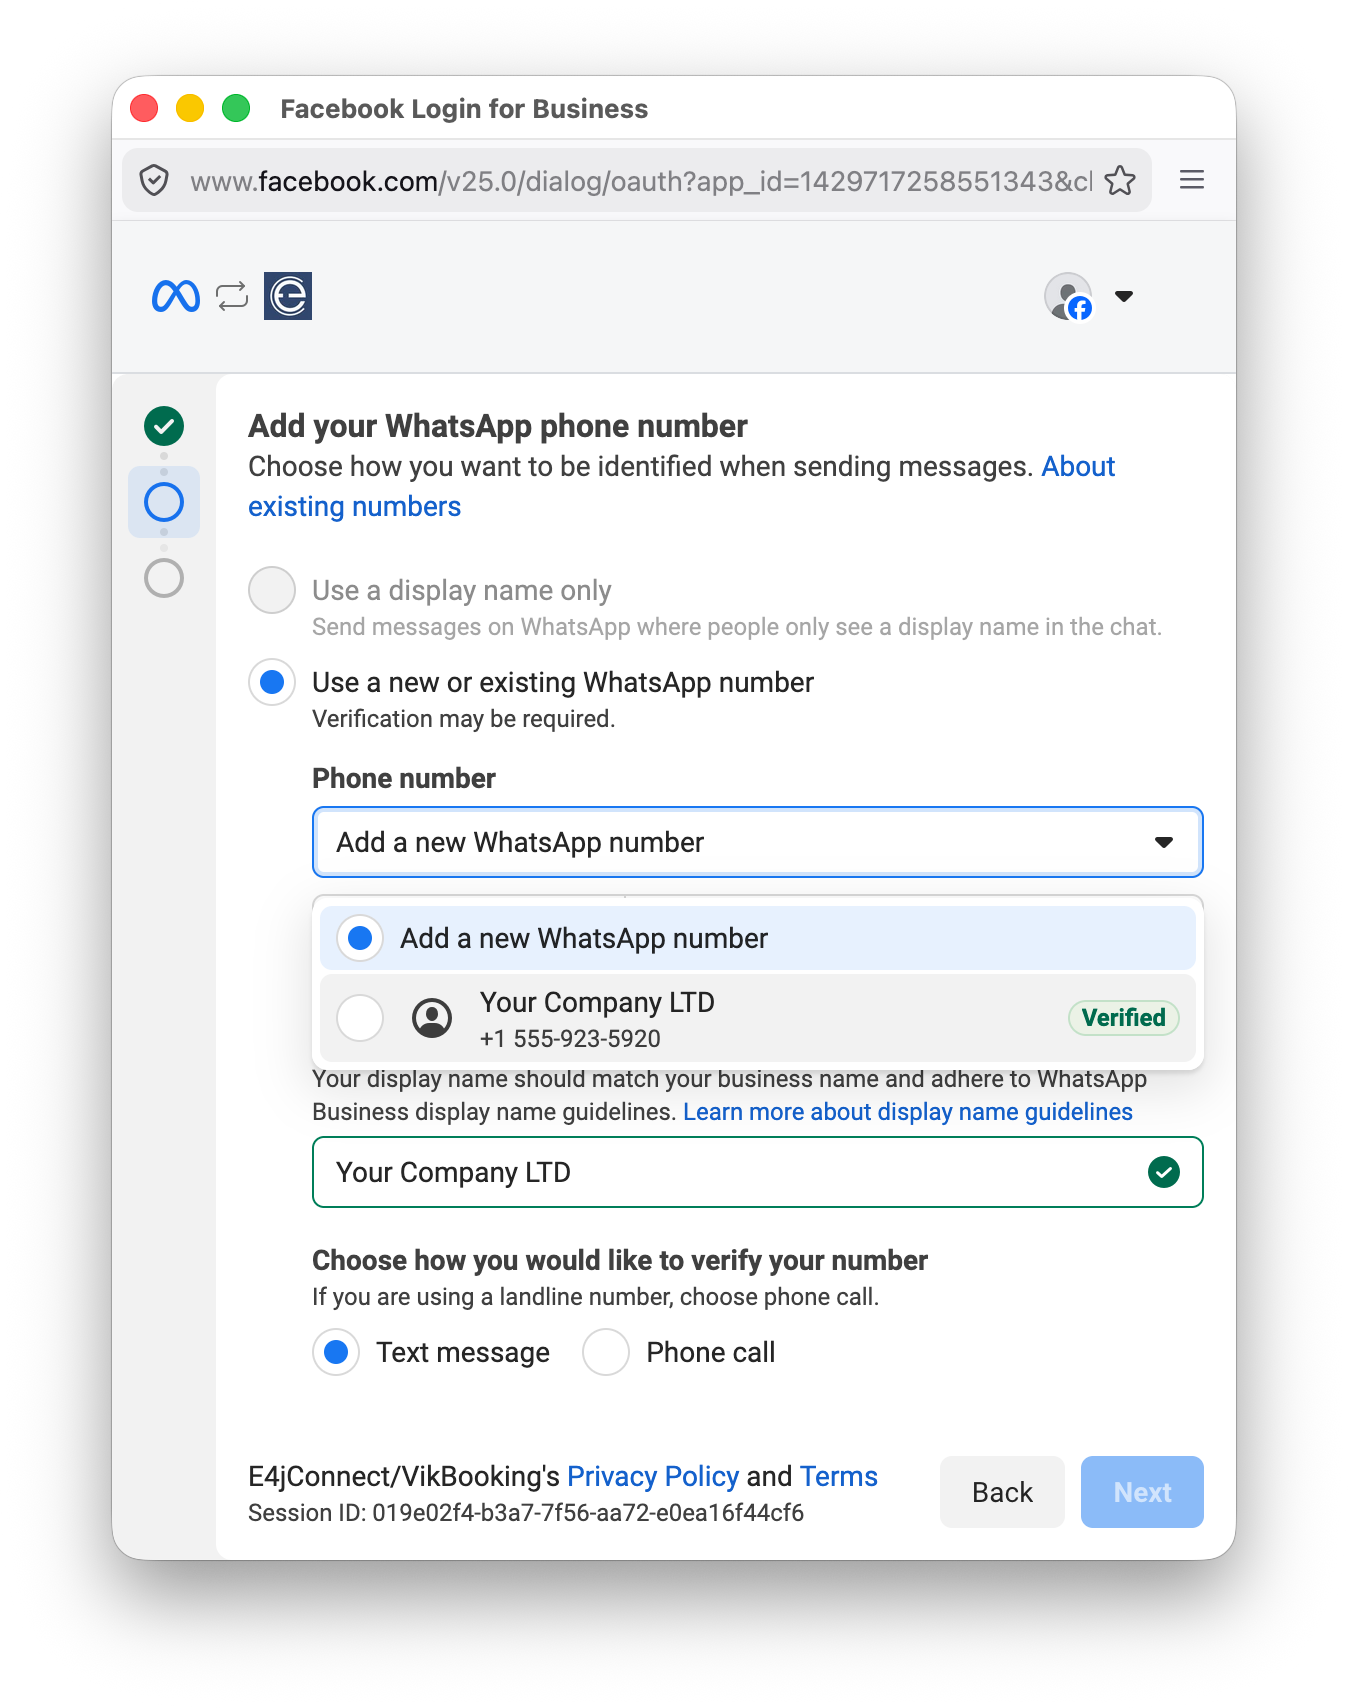
Once the authentication process is completed, you should be redirected back to the Channel Manager "Settings" page. This concludes the connection process.
First Setup
At this point, you should see a button labeled "Manage Accounts". Click this button to begin configuring your WhatsApp templates.
The Messaging Accounts page displays the following sections:
- Configurations, shows the list of configured templates;
- Manage Accounts, displays the list of connected WABA;
- New Configuration, allows you to start creating a new template.
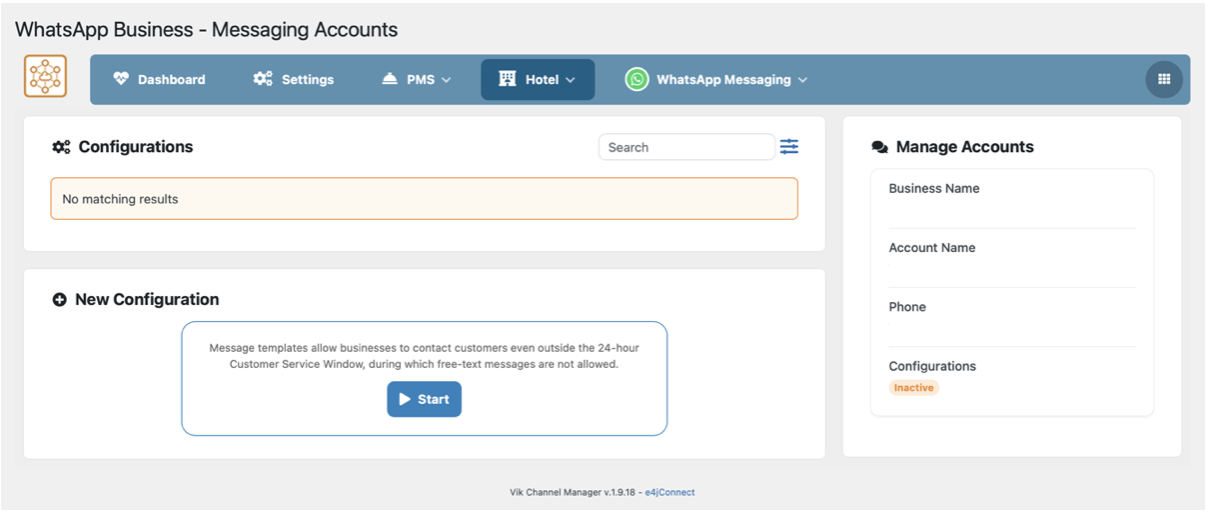
Initially the status of your connected Account will be displayed as “Inactive”. Whatsapp requires at least one approved Template for the status to be converted into “Active” .
Templates
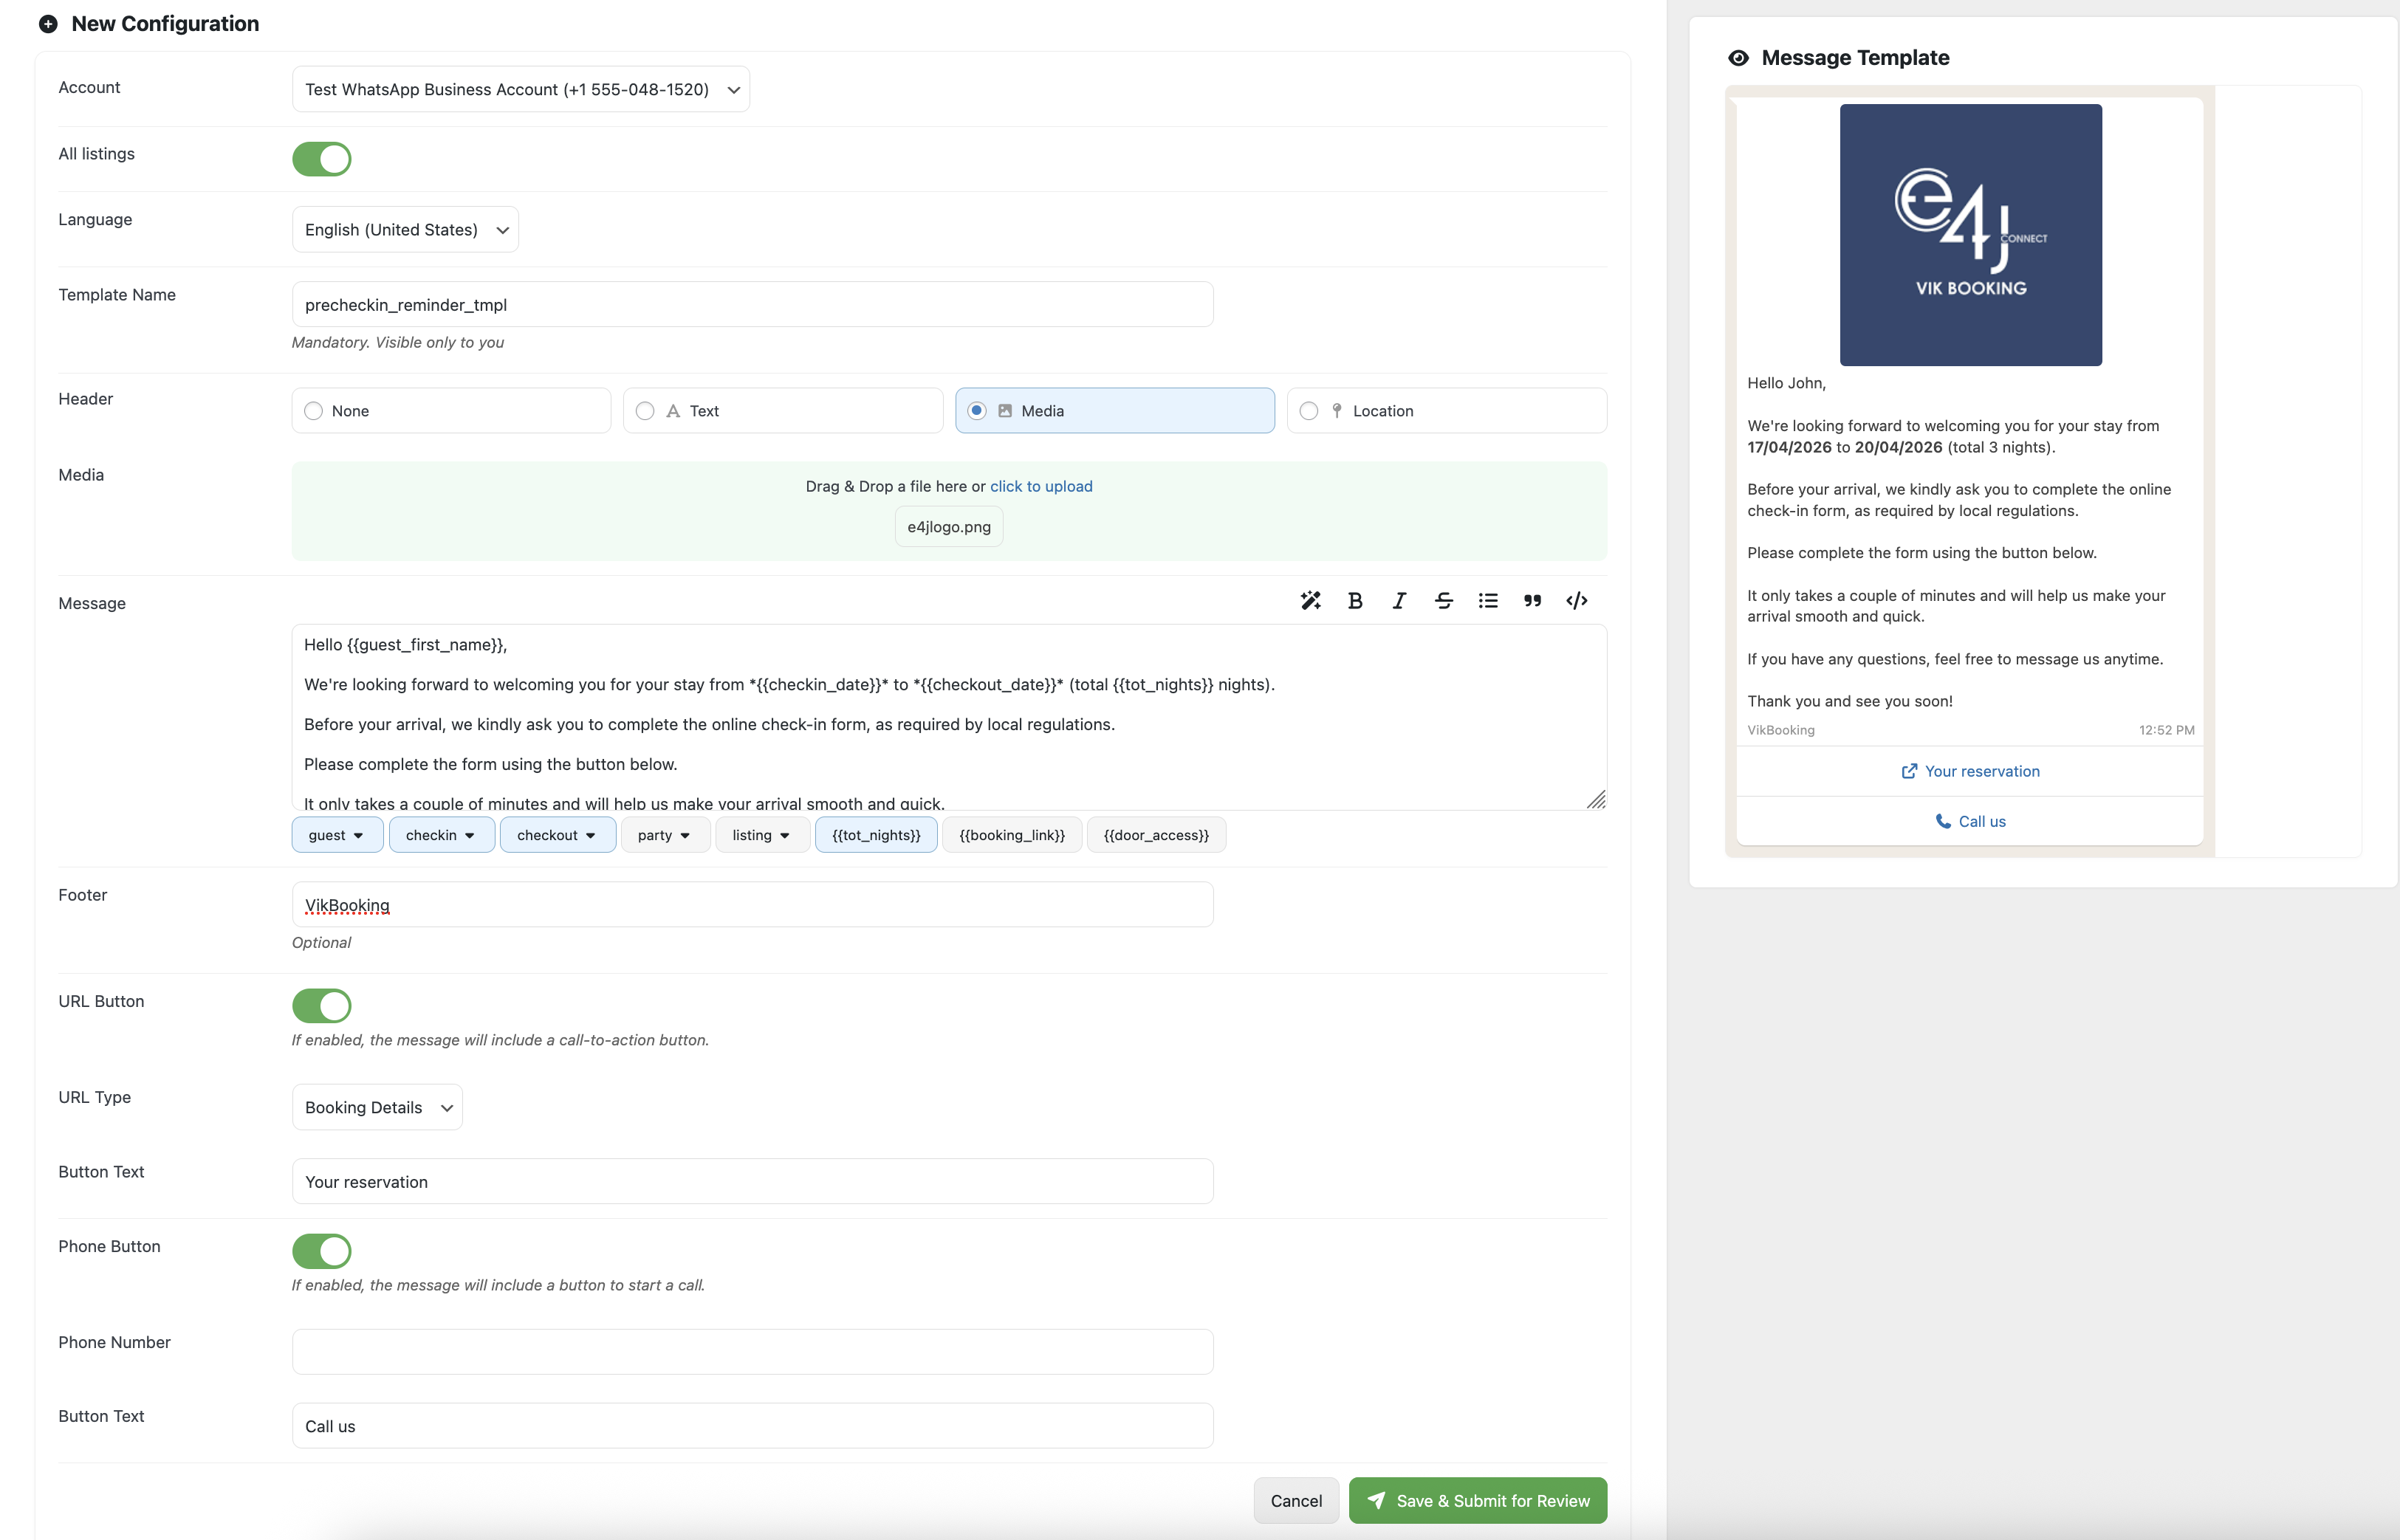
In the New Configuration section, click the Start button to begin creating a new template.
To speed up the configuration process, we provide several predefined models based on suggested presets. By hovering the mouse over each model, you can immediately preview the final template layout.
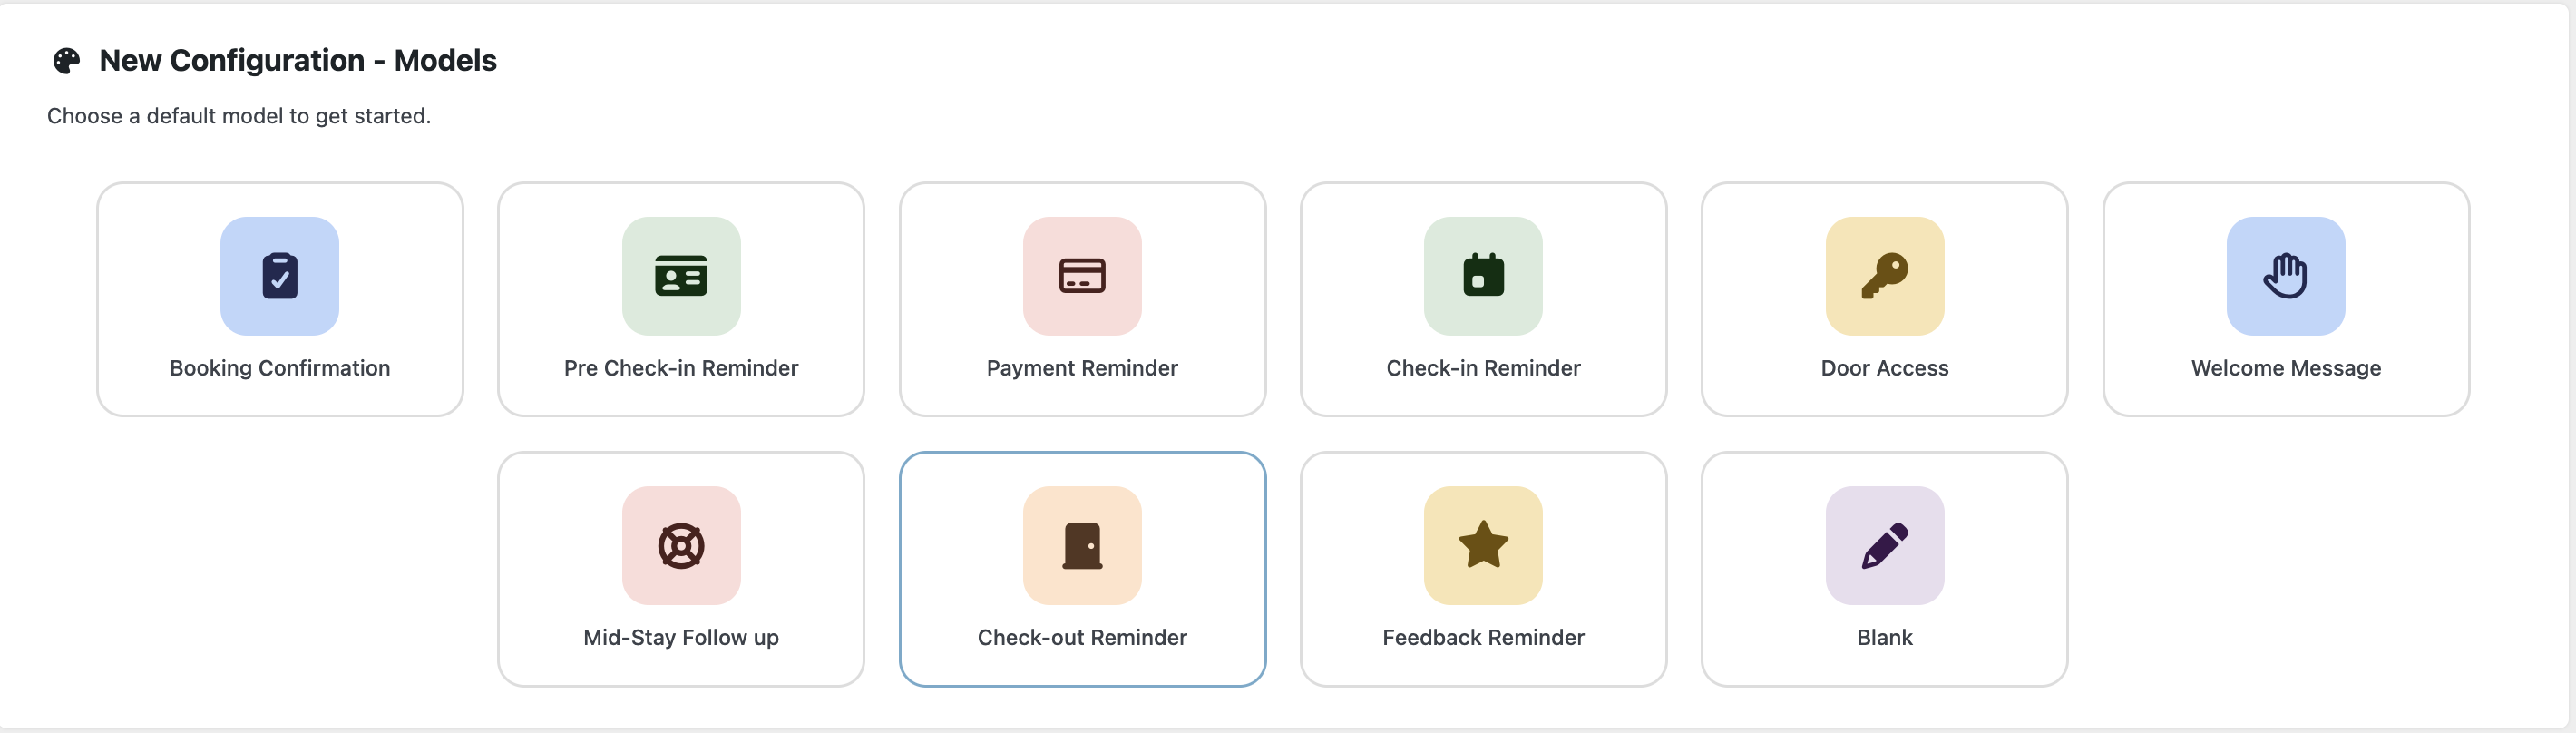
Click on a model to proceed, then follow the steps below. Any change applied to the template configuration should immediately update the preview, provided that the change affects the visual layout. The preview is available on the right side of your screen.
- Select the WABA to which this template belongs.
- Enable the All Listings option if the template should be used for all listings. Disable it if the template should apply only to specific listings.
- Select the template language. New languages can be installed from the CMS (WordPress) configuration. If AI service is included in the subscription plan, changing the language will automatically translate all configured content.
- Enter a descriptive name for the template.
- Choose a header type for the template from the supported options: None, Text, Media, or Location. Selecting “None” will not insert any header, Text will allow to set a title for the message, Media supports images, videos and various types of files: pdf, png, jpg, jpeg, mp4, webm, ogg, mov.
- Write the message content and optionally insert the supported tags. The template message supports the following WhatsApp formatting options: bold, italic, strikethrough, unordered lists, block quotes, and code
- Enter an optional footer for the template.
- Choose whether the template should include a button to visit a specific link. You have three options: Booking Details redirects the clients to their booking details on the website, Pre Check-in brings clients into the pre check-in compilation module, Custom allows you to insert a custom link. Through the Button Text parameter you can rename the button.
- Choose whether the template should include a button to start a phone call.
- Click Save & Submit for Review and wait for the approval response.
If the configured template complies with Meta requirements, the newly created template should now appear in the Configurations list with a PENDING status.
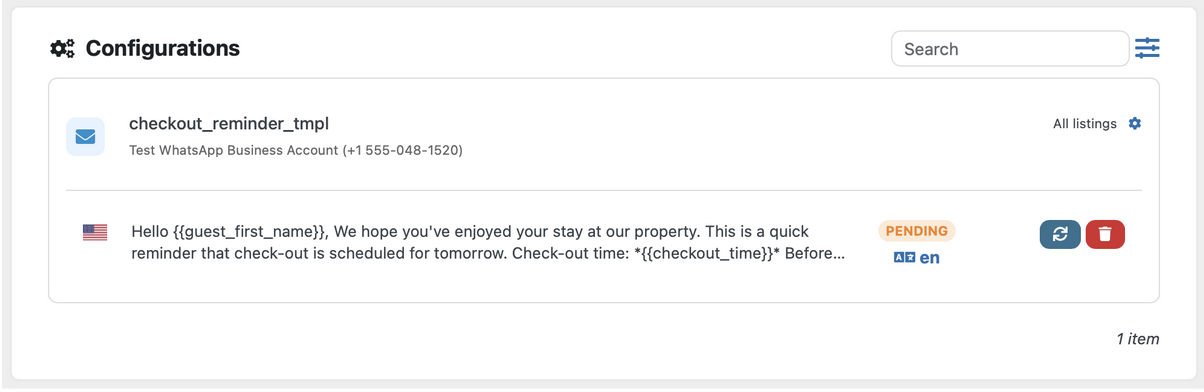
The template status is automatically updated regularly. Alternatively, you can click the Sync button to manually check whether the status has changed. Updating a new template from scratch can take approximately 3 to 6 hours, while minor changes to an existing template are usually approved within 5–10 minutes. These timeframes are based on our tests; however, the process is entirely managed by Meta, so they should be considered approximate rather than exact.
You can also click on the language label below the status to translate the template into additional languages.
Clicking the gear icon next to All Listings allows you to configure the listings that are eligible for the template. This configuration is not related to WhatsApp and is used exclusively by Vik Channel Manager to determine the most appropriate templates for specific bookings when using the AI-powered automatic messaging functions.

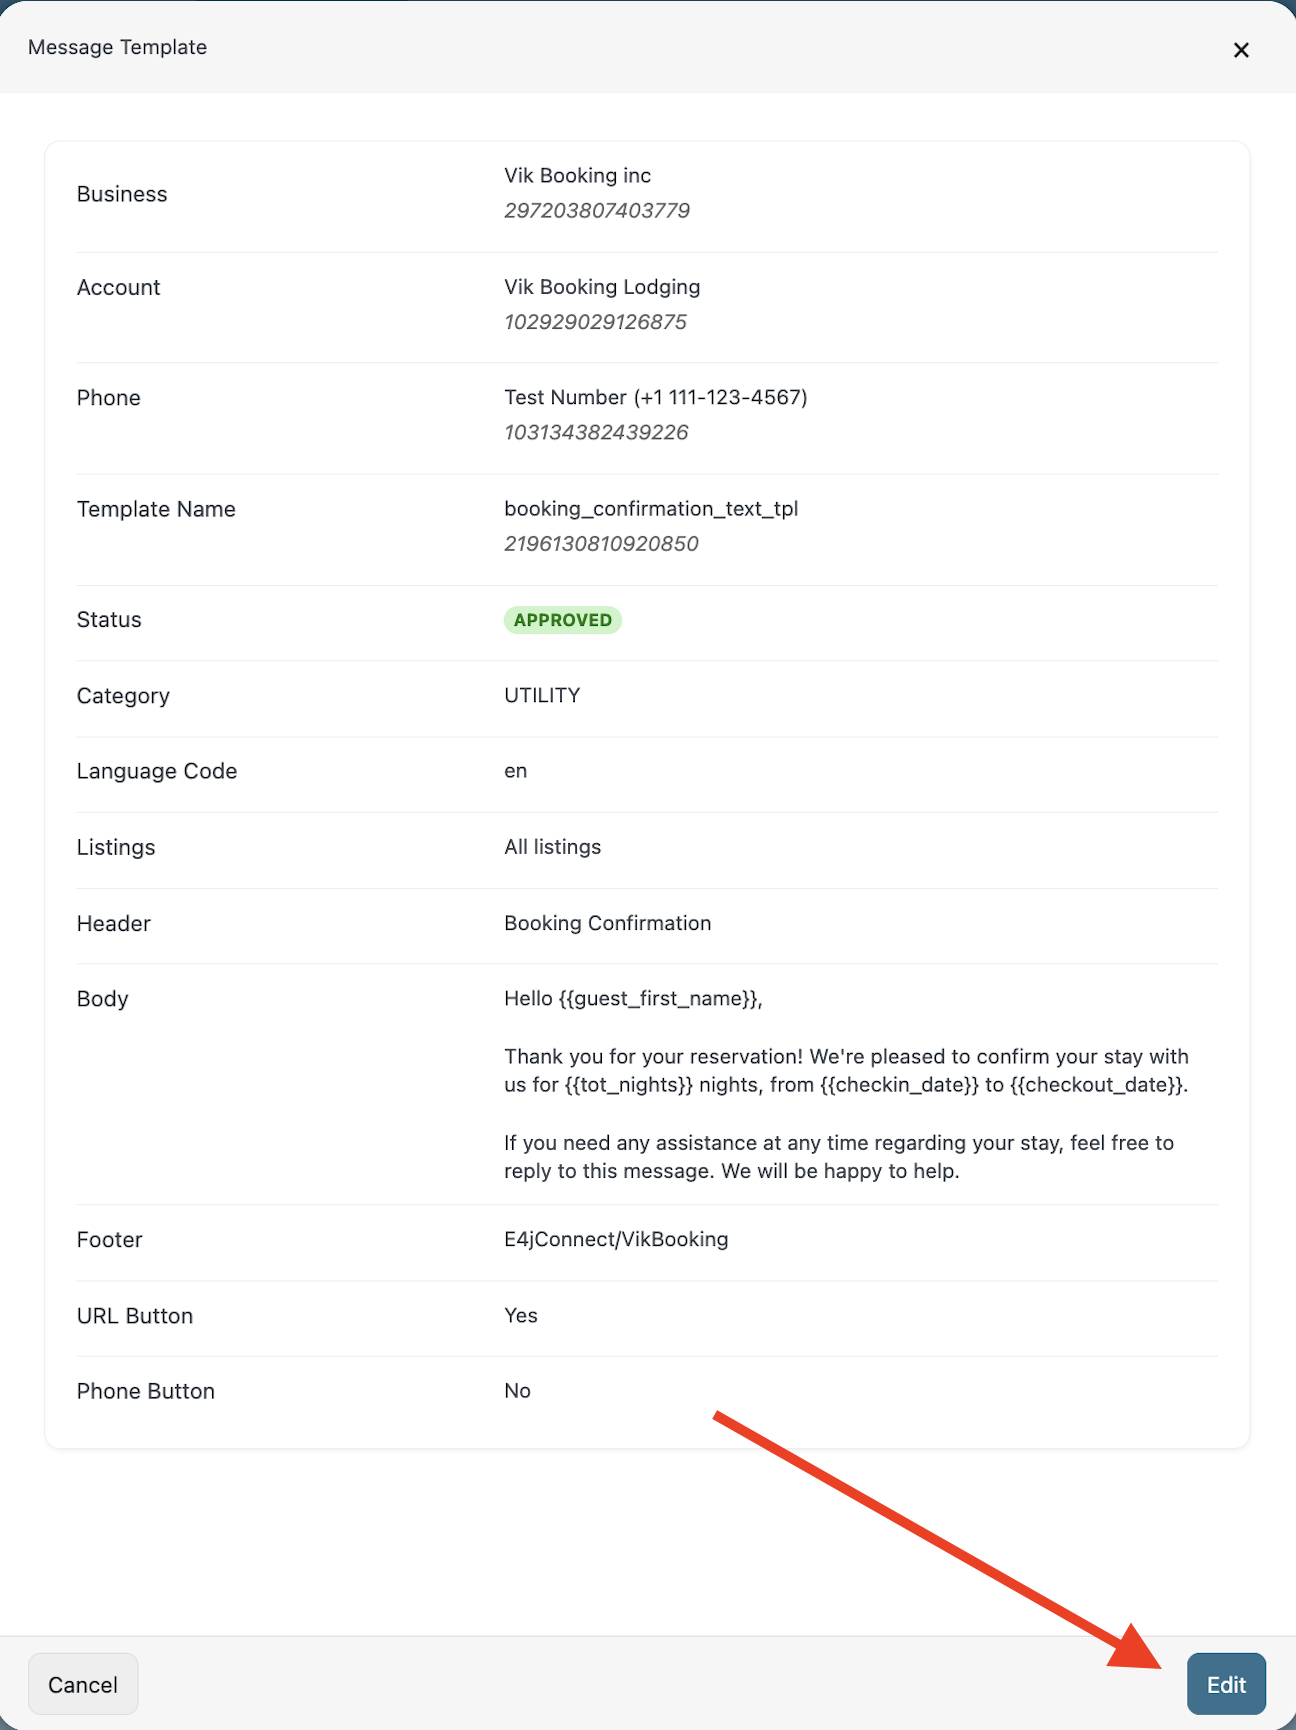
Clicking on a template displays a summary of its details. If the template status is different from PENDING, an Edit button will appear in the bottom-right corner allowing you to edit the template.
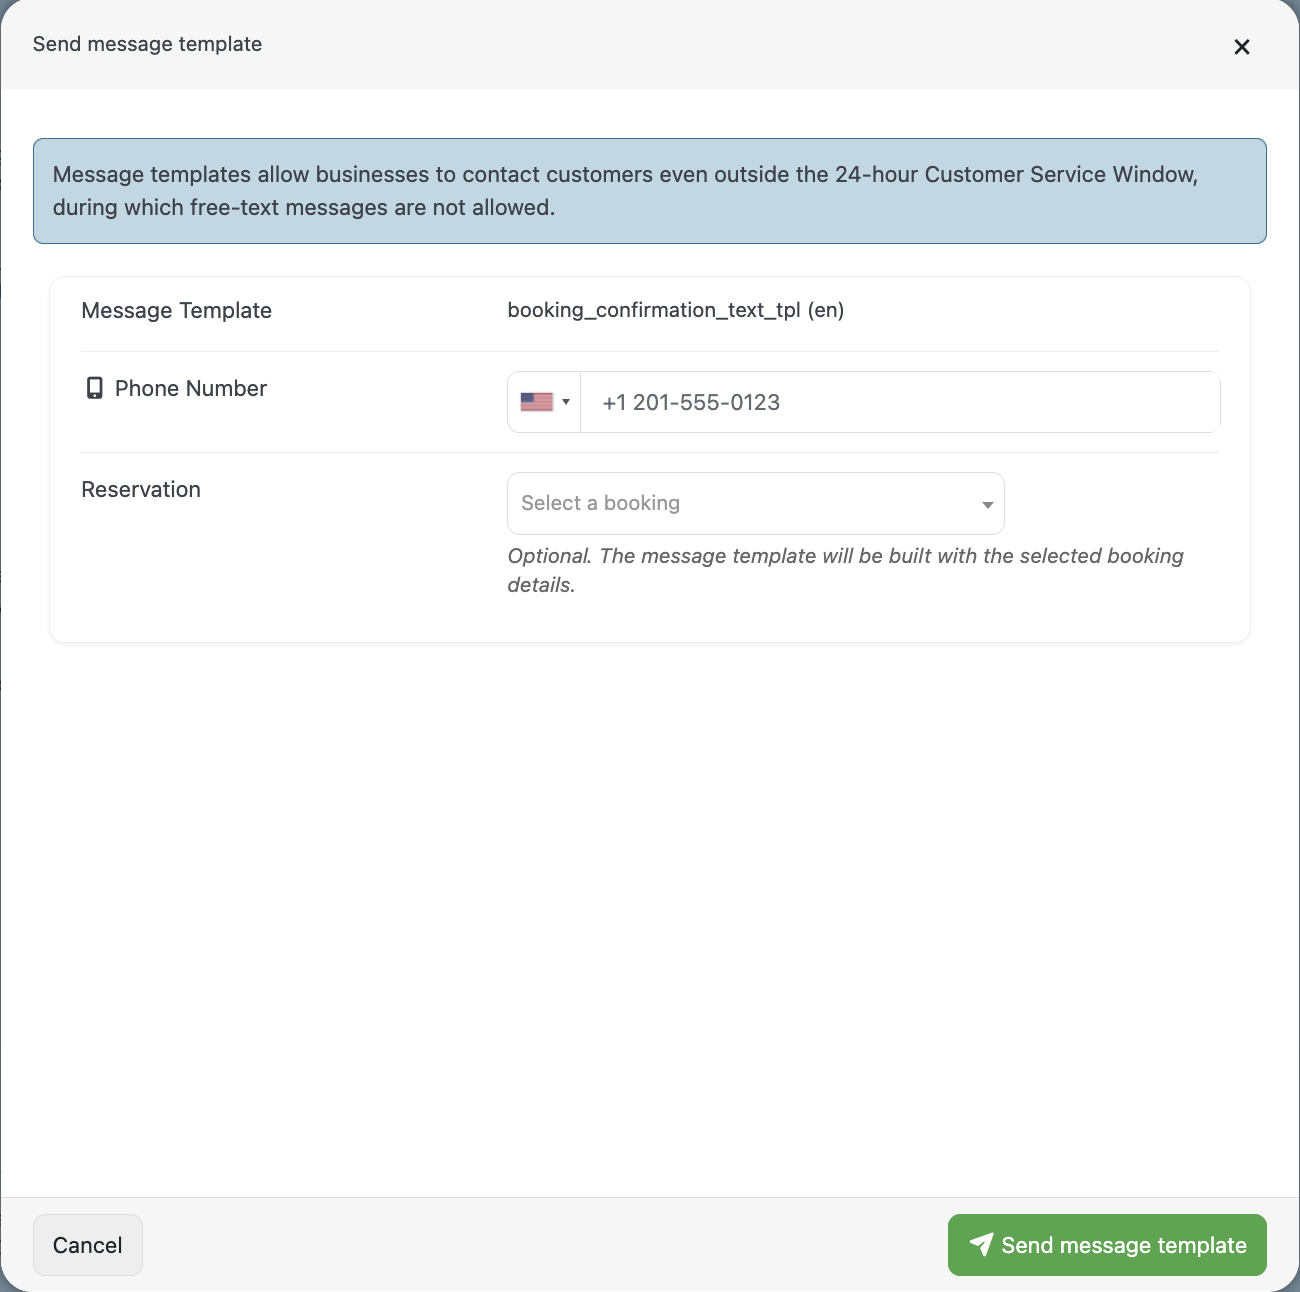
Once the template status is APPROVED, a new green button will appear between the Sync and Trash buttons. This button allows you to test the delivery of the template.
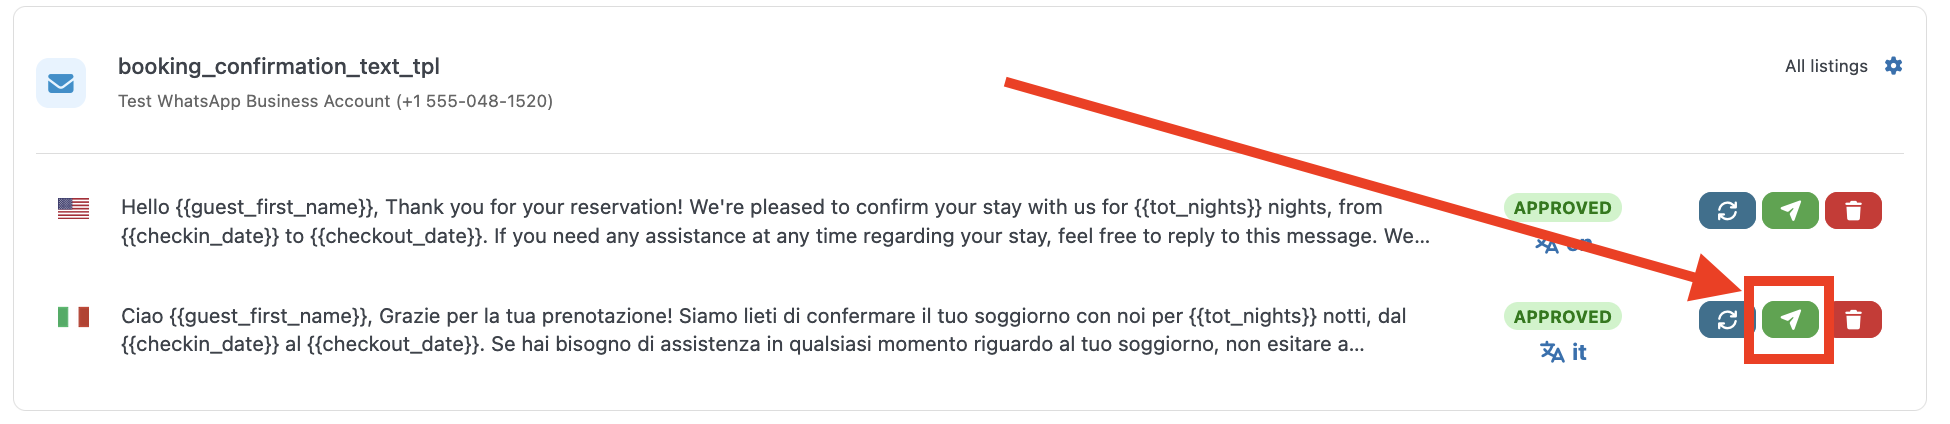
Here you can enter the phone number that should receive the template message via WhatsApp. You can also optionally select a booking to use when sending the template. If no booking is selected, the template tags will be replaced with dummy data.
Working Flow
1. Sending a Template
As previously mentioned, it is not possible to initiate a conversation with a guest using a standard text message. The first message must be sent using an approved template previously configured. Once the customer replies to the template message, a 24-hour customer service window is opened, allowing you to freely communicate with the guest at no additional cost.
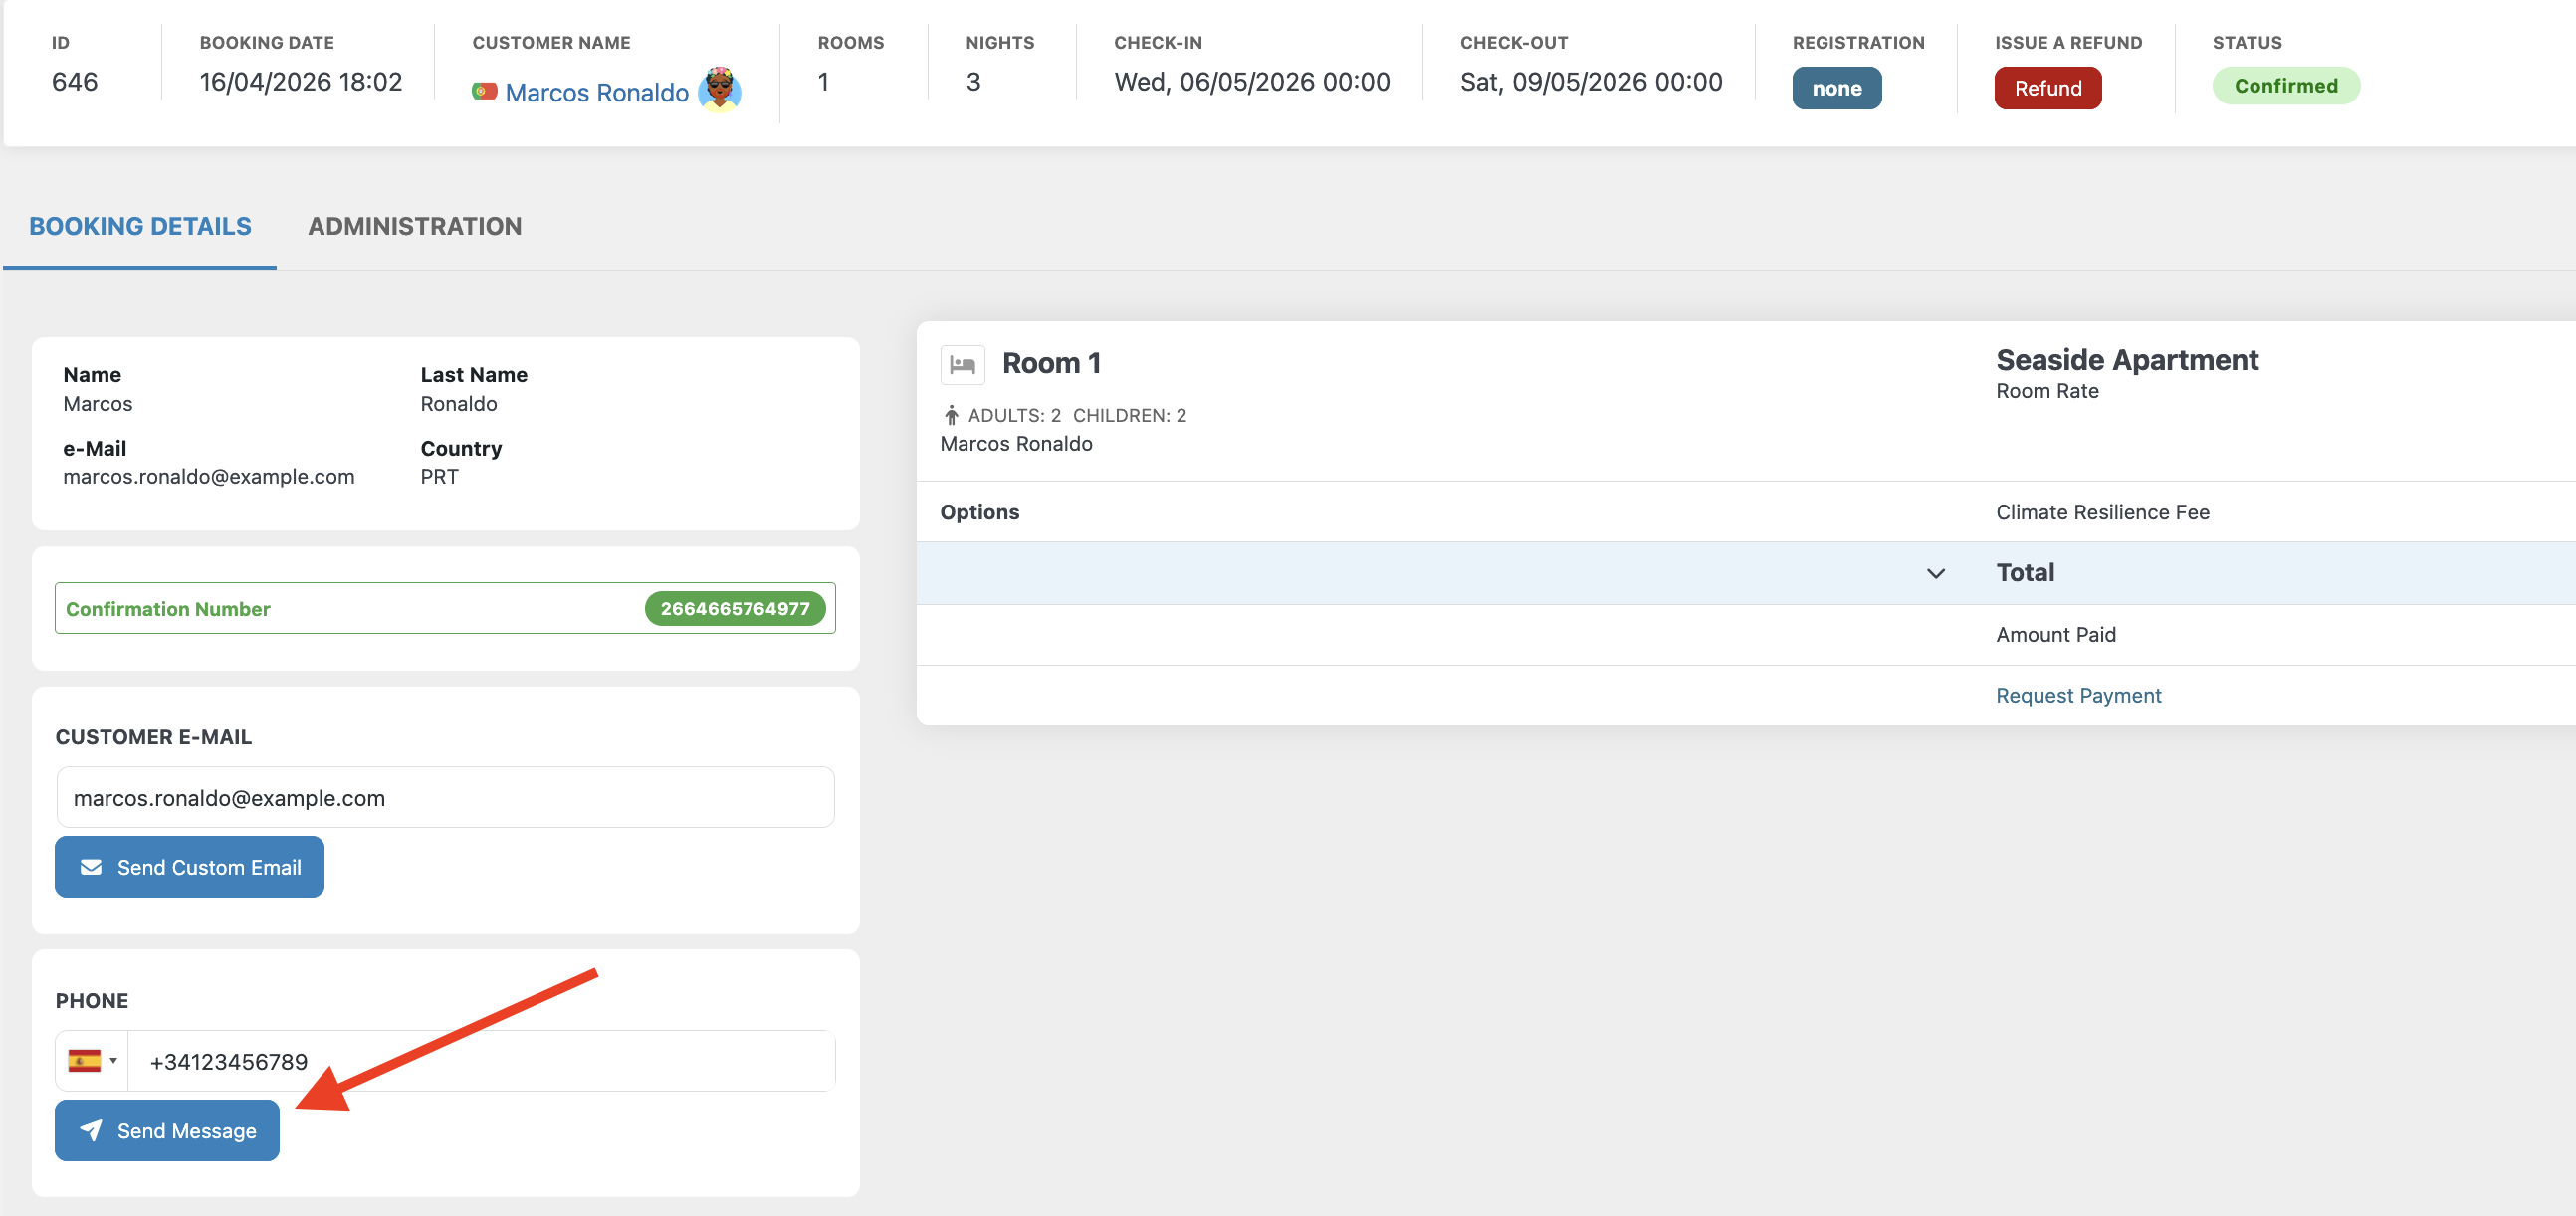
To send a template message open the Booking Details page in Vik Booking of the reservation you want to contact and use the dedicated “Send Message” button.
Note: A phone number needs to be saved for the “Send Message” button to appear.
Once done a dedicated window will open to select the Message Template to use. Only already APPROVED Templates will appear in the selection menu.
A preview will also be displayed to ensure you have selected the correct message template and that everything is in order.
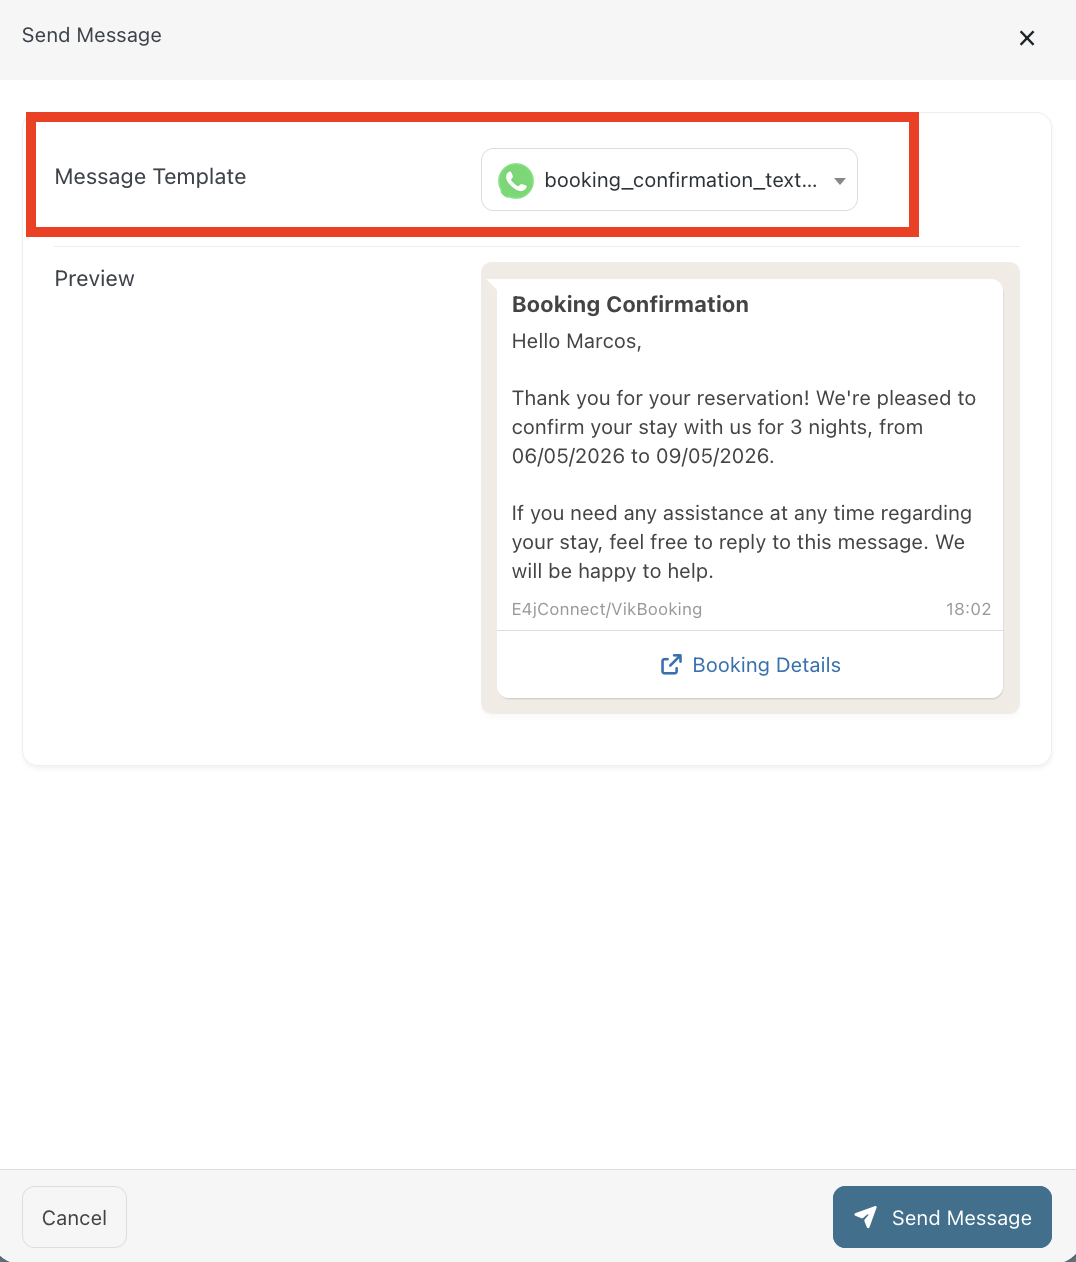
Finally, click “Send Message” to send your template message.
The sending of template messages can be automated through the Scheduled Actions page in Vik Booking (Cron Jobs). Further details are provided later in this documentation.
2. Viewing Incoming Messages
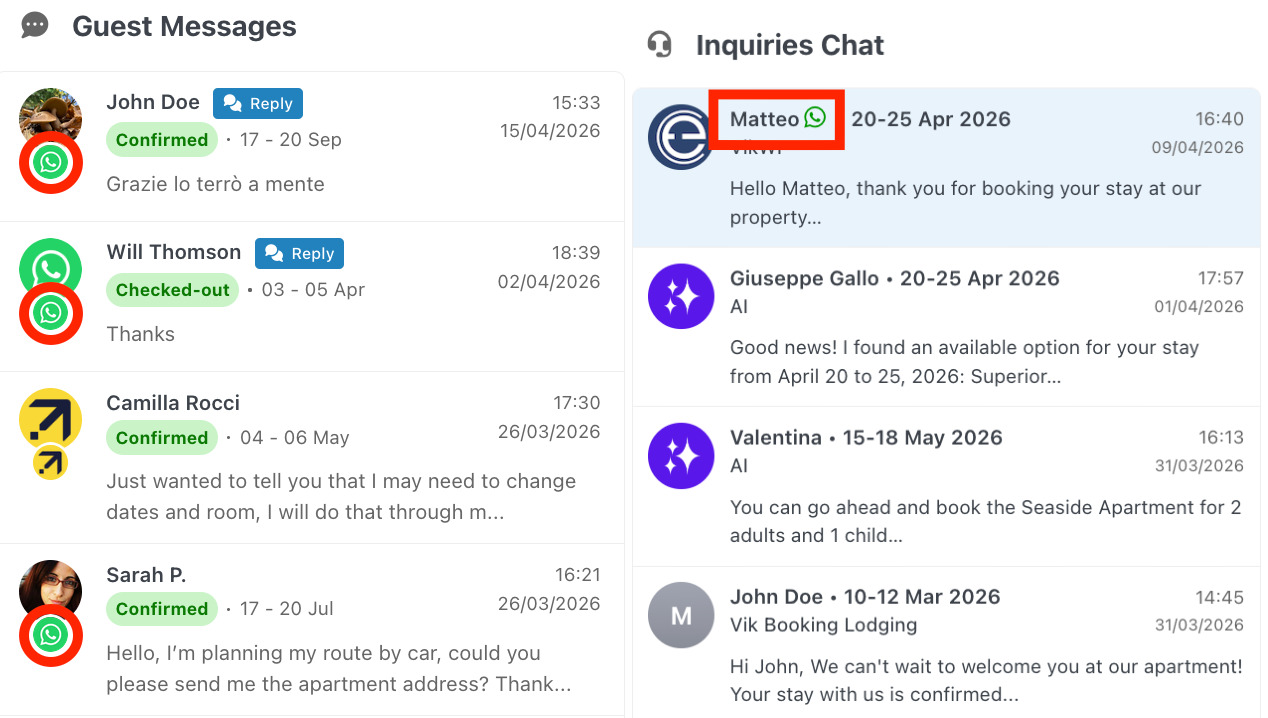
All WhatsApp messages are centralized in Vik Booking through two dedicated widgets: the “Guest Messages” widget and the “Inquiries Chat” You can quickly access both via the Multi-task Panel by searching for “Guest Messages” or “Inquiries Chat”.

When a guest sends a message via WhatsApp, Vik Channel Manager determines whether the message is related to an existing reservation or to a new inquiry. This is done by comparing the guest’s phone number with the phone numbers registered for all upcoming reservations.
If a match is found for a CONFIRMED reservation, the message is added to the “Guest Messages” widget and associated with that reservation. The same applies to CANCELLED reservations (e.g. when a customer needs to contact the property to request a refund according to the cancellation policy).
This behavior remains valid until 7 days after the checkout date. After that period, any new messages from the same number, if no other active reservations are found, will be added to the “Inquiries Chat”.
In the final scenario, if a phone number matches a STANDBY reservation and the guest has never sent a message before, a new thread is created in the “Guest Messages” widget.
Note: WhatsApp conversations are always marked with the default WhatsApp icon.
Regardless, every time a message is received, a notification appears in the Notification Center of Vik Booking (top-right corner). From the notification, you can click the “Reply” button to instantly open the dedicated widget and respond to the message.
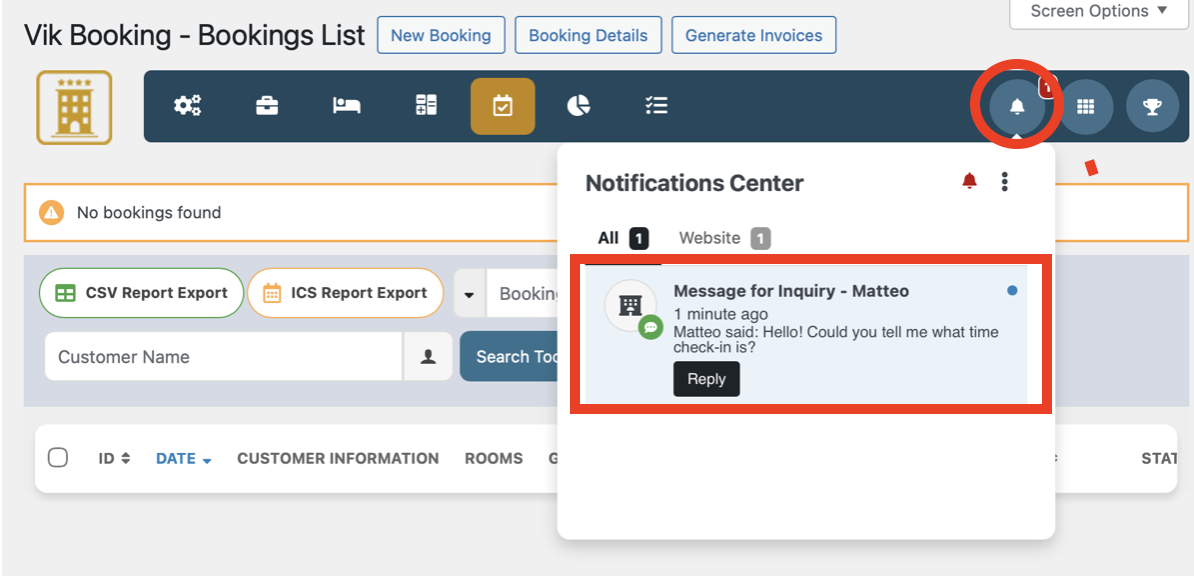
3. Replying to Messages
To reply to a message, either click the “Reply” button in the notification or open the dedicated widget (Guest Messages/Inquiries Chat) from the Multitask Panel and select the guest chat.
- Guest Messages
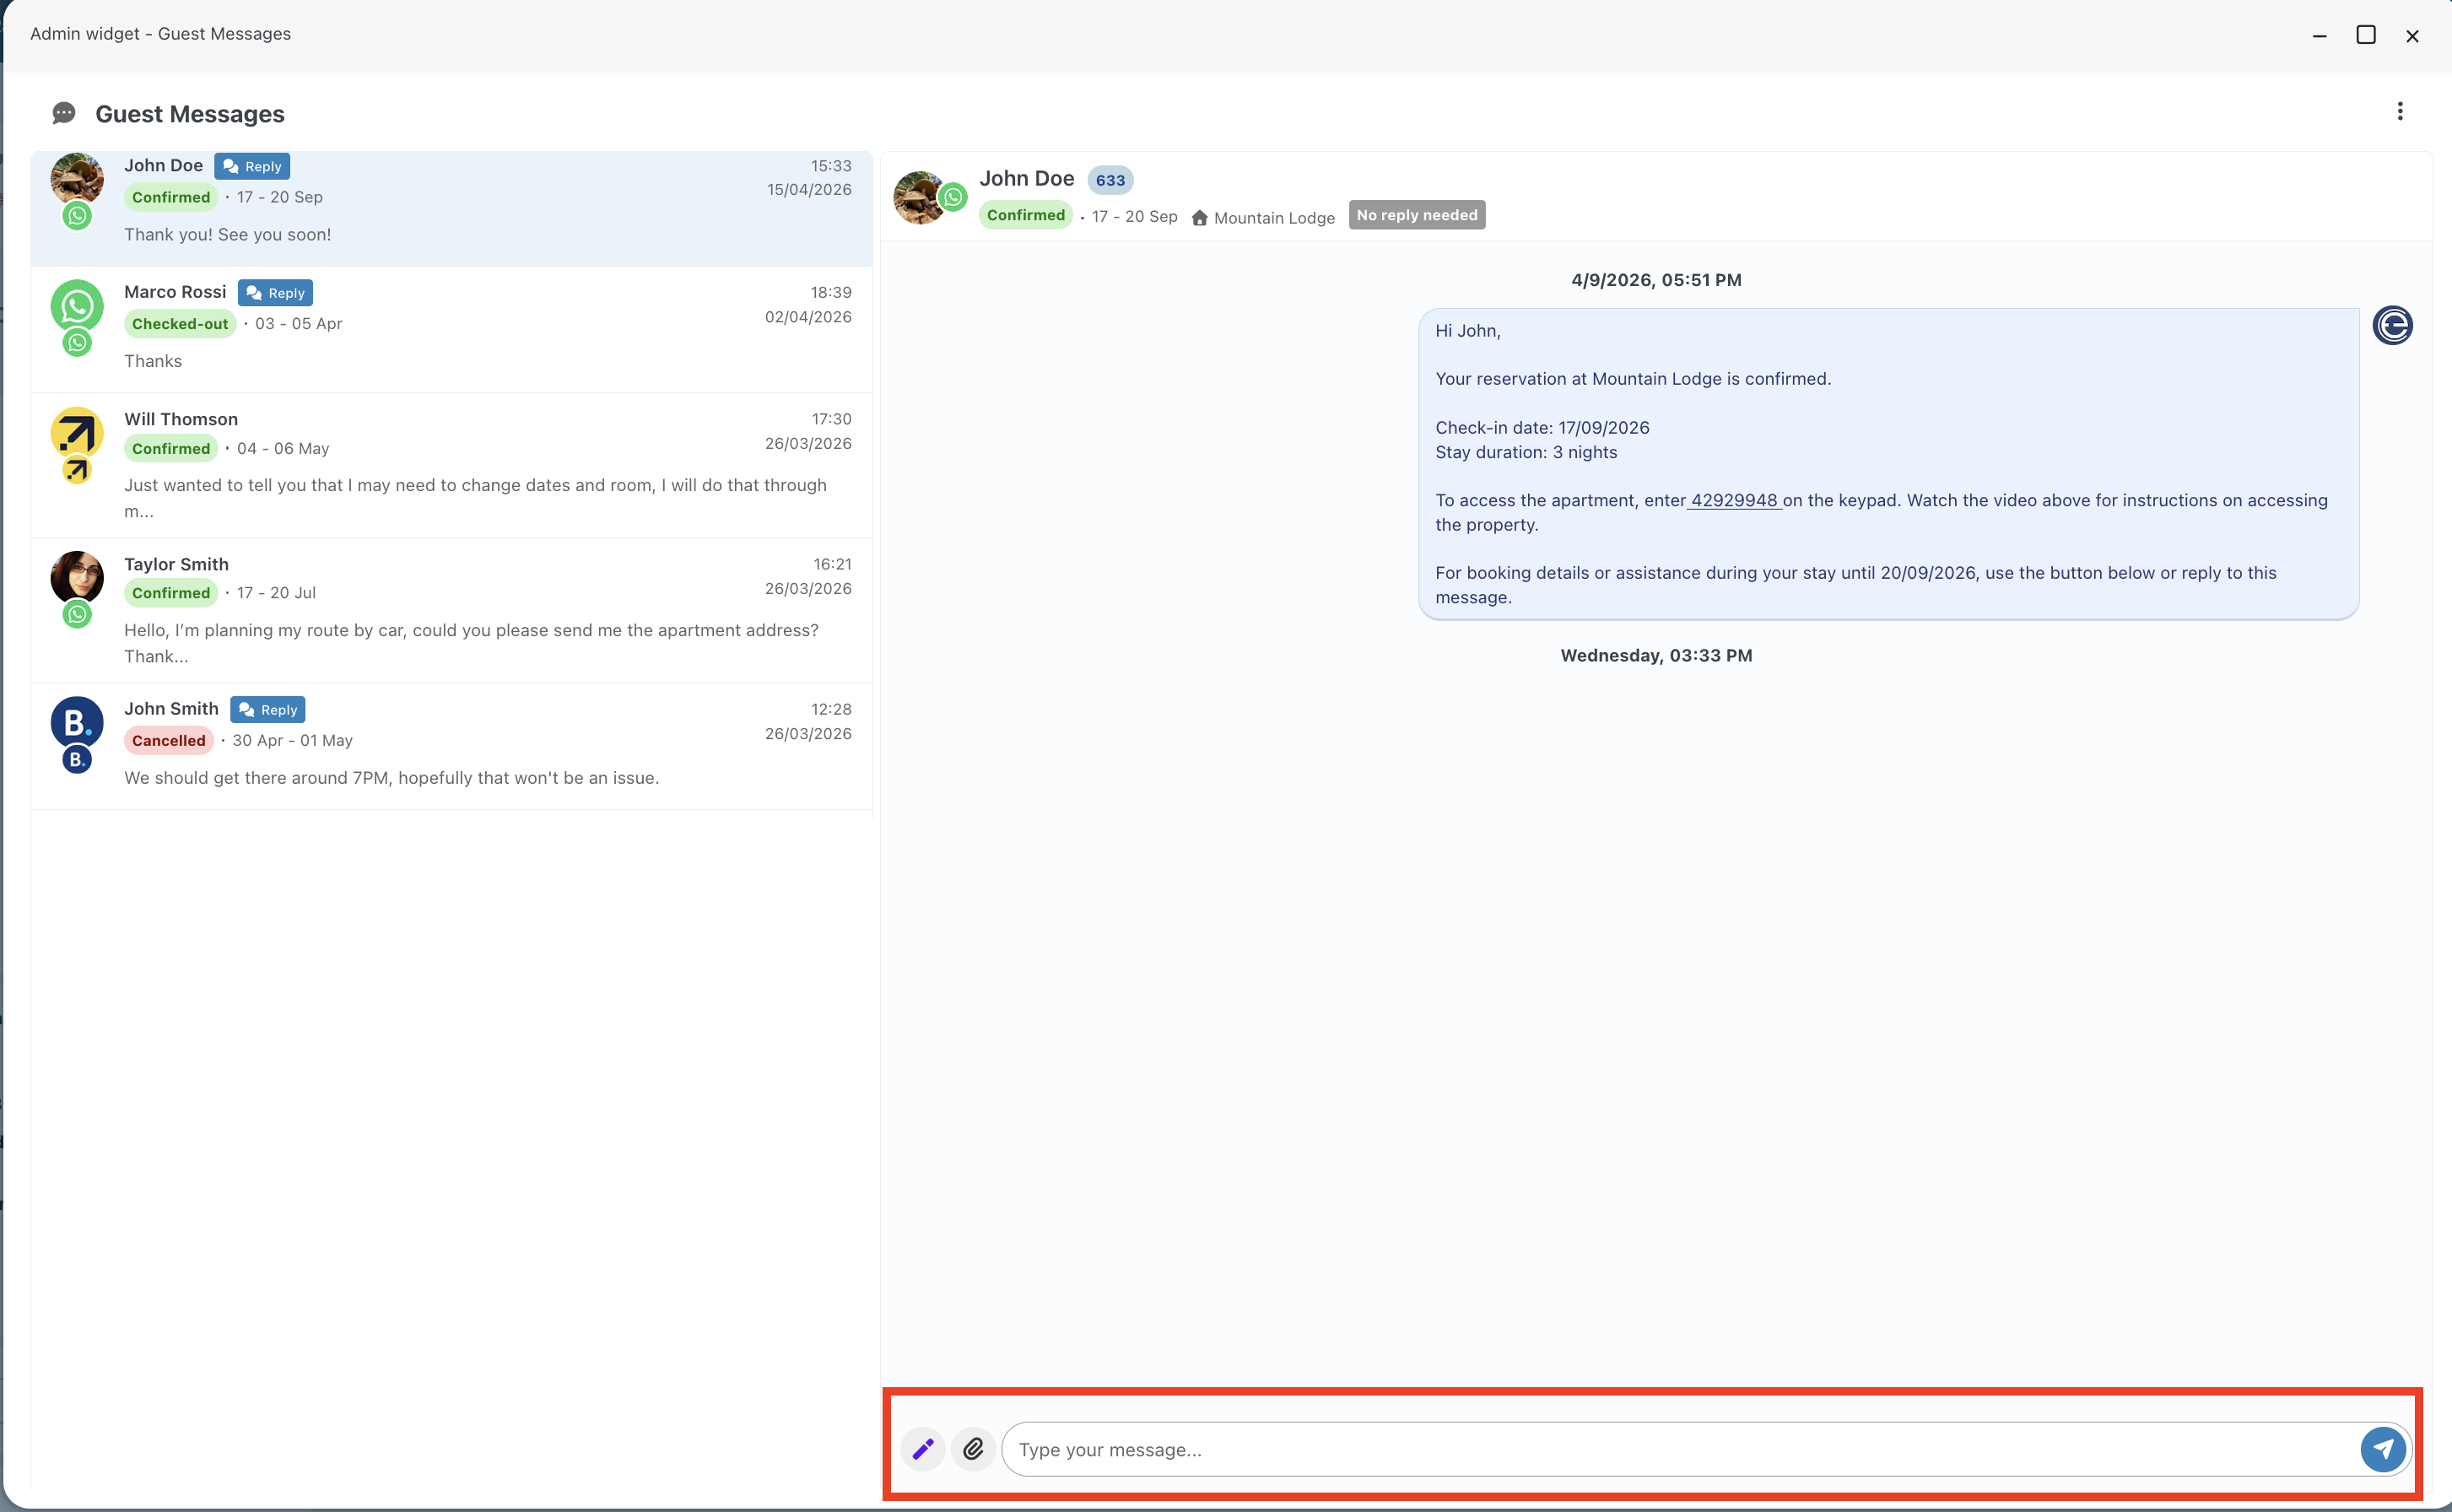
After selecting a chat, the bottom bar displays (from left to right): AI Button to generate an automatic response with the AI Assistant, Attachments to select a file to send, Text Area to write your message, and Send Button to send the message.
- Inquiries Chat
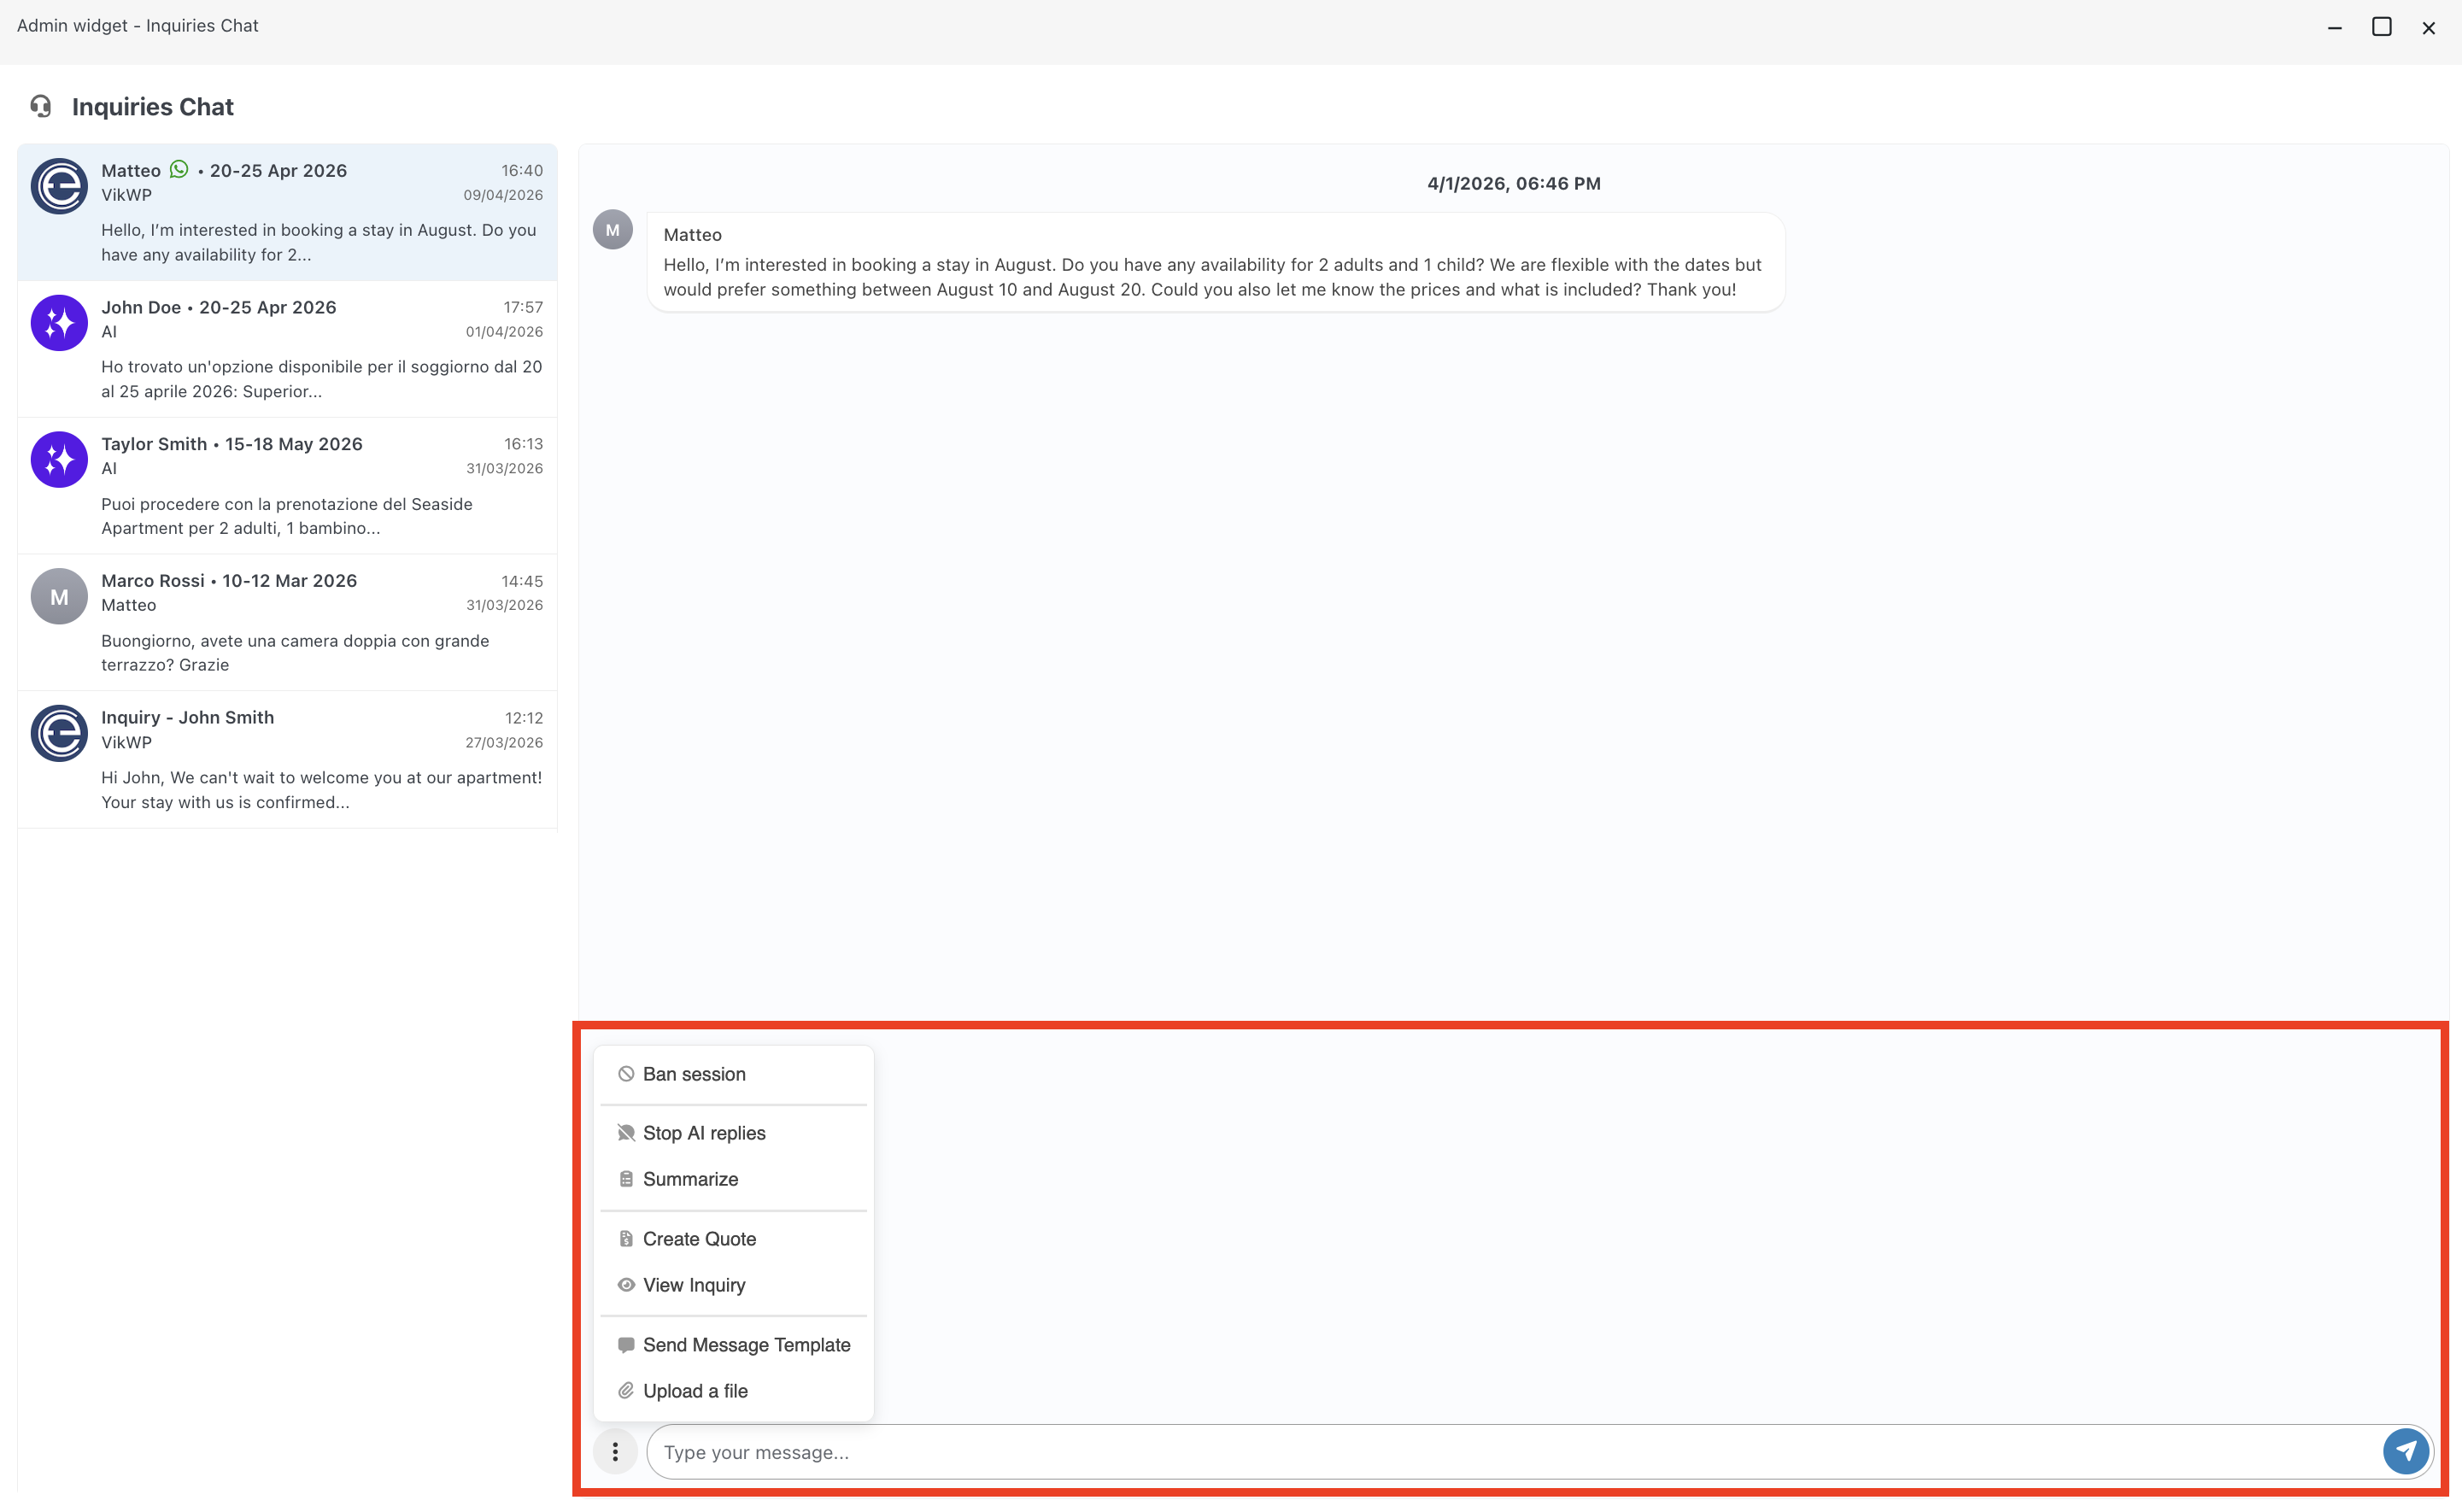
After selecting a chat, the bottom bar displays a three-dot menu. By clicking it, you can access the following actions:
- Ban/Unban Session: Block or unblock the phone number to prevent or allow new messages. If the chat is managed by the AI agent, SPAM content can be automatically detected and blocked.
- Stop/Resume AI Replies: Disable or re-enable the AI agent for this thread.
- Summarize: Ask the AI agent to summarize the conversation.
- Create Quote: Open the “Create Quote” page in Vik Booking to send a quotation to the customer.
- View Inquiry: Use the AI agent to quickly review the customer request (Stay dates/ number of guests/ preferred listings, if any)
- Send Message Template: Send an already approved message template to the guest.
- Upload a File: Send an attachment with the message.
Following you have the text area where you can write your message, and the Send button to send it.
Autoresponder Preview
A preview of the autoresponder in action during a conversation initiated via WhatsApp. The autoresponder operates through the AI channel.
Automation - Scheduled Actions
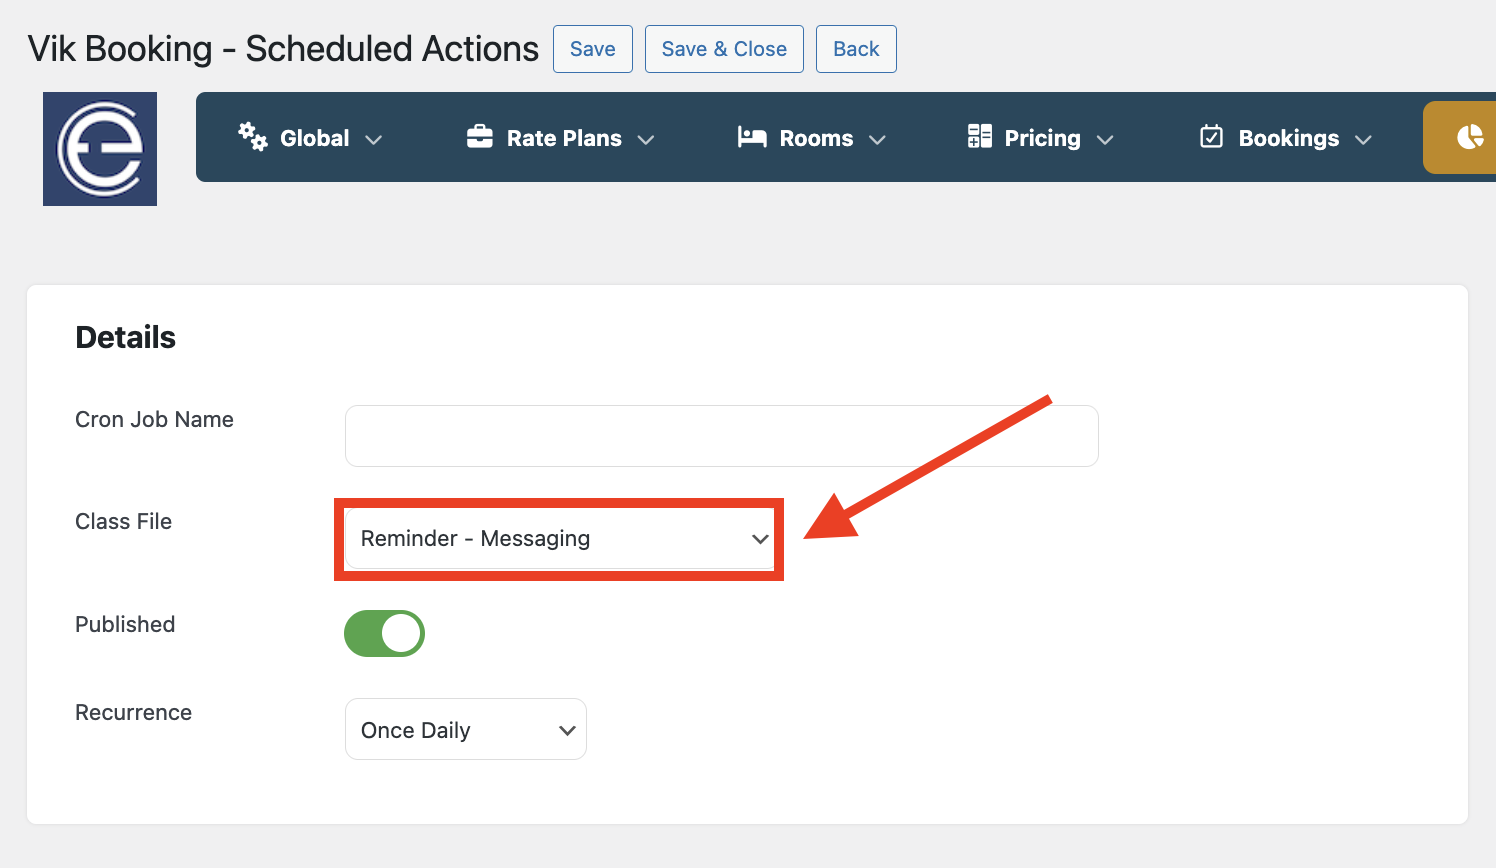
WhatsApp template messages can be automated via the Scheduled Actions page in Vik Booking (Cron Jobs).
To configure this workflow, create a new Scheduled Action and set the Class File to “Reminder - Messaging”. This handler is specifically designed to interface with WhatsApp, enabling the automated dispatch of template messages based on predefined triggers and scheduling rules.
There are four predefined options you can choose from:
- Check-in Reminder: Select a WhatsApp template and define how many days before the check-in date the message should be sent.
- Reservation Date:Select a WhatsApp template and define how many days after the reservation is made the customer should be notified.
- Pre Check-in Completed: Select a template and define how many days after the pre check-in is completed the customer should be notified (useful, for example, for sharing door access codes).
- After Checkout Message: Select a template and define how many days after the check-out date the customer should be notified (useful, for example, to request a review).
For each of the options above two parameters are available to:
- Choose whether to include or exclude Channel Manager reservations.
- Define whether the message should be sent for specific listings or for all listings.
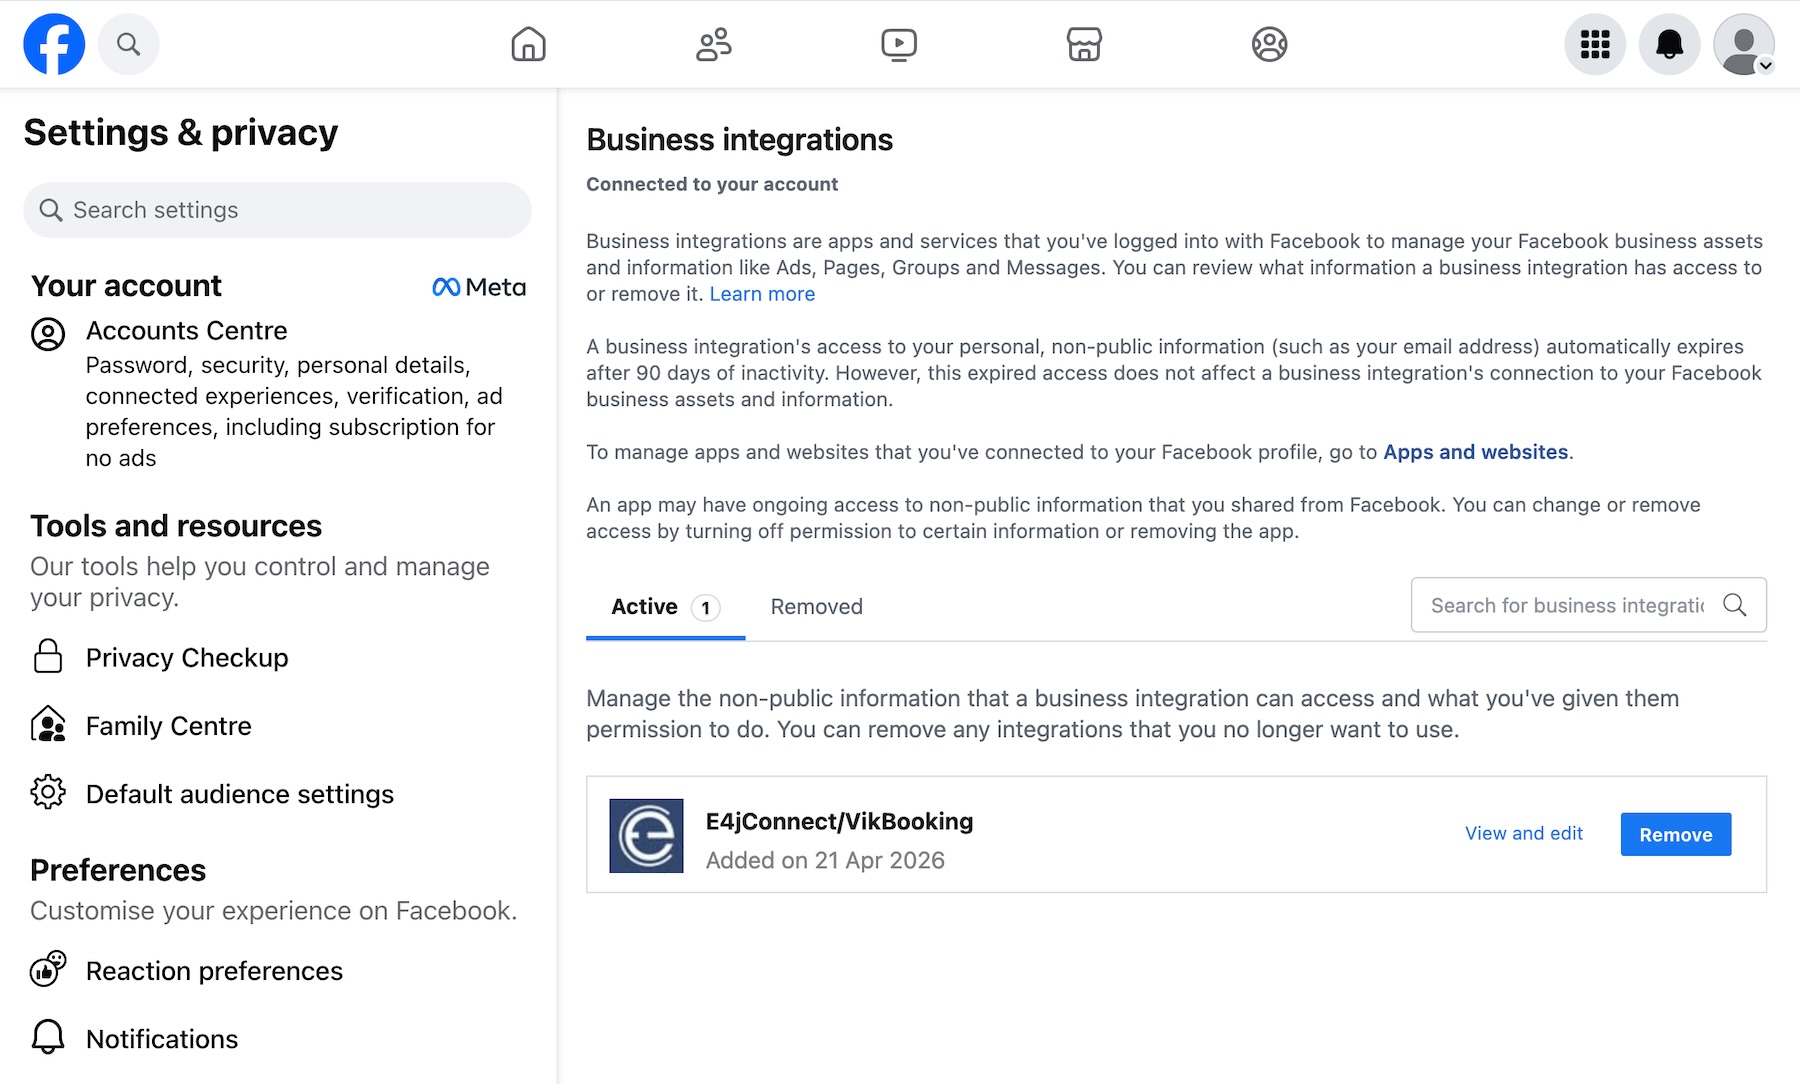
Disconnecting E4jConnect/VikBooking (Meta) App
You can disconnect the e4jConnect/VikBooking Meta application for WhatsApp at any time from your WhatsApp Business Account (WABA).
First, log in to your WABA using the following link:
https://www.facebook.com/settings/?tab=business_tools
Once logged in, navigate to “Settings & Privacy” and open the “Business Integrations” section. There, you will find a list of all active Meta apps, including the e4jConnect Meta App.
Simply click the “Remove” button next to the app to disconnect it.
e4jConnect.com and e4j - Extensionforjoomla.com are not affiliated with or endorsed by the Joomla! Project or Open Source Matters.
The Joomla! name and logo is used under a limited license granted by Open Source Matters the trademark holder in the United States and other countries.
E4J s.r.l. - VAT N. 06794860483![]()